

UPDATE: November 15, 2018
Images and text have been updated to reflect Storyline being rebranded to Invocable.
Introduction
The Invocable prototyping tool enables easy integration with Airtable for data processing. Utilizing Airtable is an ideal way to store rows of interrelated data and retrieve them into your Invocable projects and ultimately your Alexa skills.
Level: Beginner
This tutorial is designed for beginner Alexa Voice Skill Developers, and no coding experience is required.
Tutorial Scope
This tutorial describes a specific method for retrieving records from an Airtable database (aka “base”) into an Invocable prototyping project. Using Invocable’s Integration Step, a GET method is illustrated.
The tutorial also shows how to configure Alexa Steps to recite the values from these records. Examples:
- Retrieve a single value from a specific field. A field is similar to a cell in a spreadsheet. Use the field name and a numerical record reference in an Integration Step in an Invocable project.
- Retrieve one or more field values for a single record. A record is similar to a row in a spreadsheet. The record contains a set of interrelated values in the fields. Use the field names and a numerical record reference in an Integration Step.
- Retrieve one or more field values for multiple records. Use the field names and numerical record references in an Integration Step.
What this tutorial does NOT cover:
- Retrieving a randomly selected row of interrelated values.
- Looking up and retrieving a value based on an input parameter.
These additional types of Airtable interactions may be the subject of future tutorials.
Use Case
A database contains multiple rows of data. Each row contains interrelated data stored in multiple fields (in Airtable, a “field” is conceptually similar to a “column” in a spreadsheet).
For example, the Airtable base (database) might contain quotes. Each record (row) has three fields (columns). The first field might be the quote, the second field might be the source of the quote, and the third field might be the location where the quote was made.
An Invocable project is configured to use an Integration Step to retrieve a value from a single field, a set of interrelated values in multiple fields from a single row, or multiple values stored in multiple fields and rows. The API Response within the Integration Step would specify numerical and field name parameters. The returned value(s) are stored in variable(s) for use elsewhere in the Invocable project.
What is Airtable?
Airtable is a cloud-based service. The service is considered “Part spreadsheet, part database, and entirely flexible. For Voice developers already familiar with integrating Google Sheets, Airtable is similar in that rows of interrelated data can be retrieved, and spreadsheet-like formulas can be applied.
For creative-types and those on collaborative teams, Airtable is easy to work with, and is an alternative to Amazon’s DynamoDB.
Jeff Blankenburg discusses some additional benefits of Airtable in comparison to DynamoDB in the following article:
If you are new to Airtable, you will need to create an account, and for this tutorial, the free subscription shoud be adequate both for your practice skill as well as your other smaller skills.
Once you have created and logged into Airtable, take a few minutes to review some of the video tutorials, help screens, subscription/pricing options, and terms of use to familiarize yourself with its features.
An excellent starting point is the following page. It contains additional links to a variety of reference materials:
WARNING!
Airtable offers multiple subscription levels. There is a free subscription that continues beyond the trial period, which can be a nice option if you are not going to be managing large amounts of data. However once you exceed a certain number of records, you will be expected to subscribe to one of the paid plan options.
Be sure to check the current pricing plans and plan limits to confirm Airtable is right for your project’s needs.
What is Invocable?
Invocable is a prototyping platform which makes it easy to design, build and test Amazon Alexa skills with a visual drag-and-drop interface.
This tutorial will walk you through creating a very simple test project, show you how to upload it as a skill to the Amazon Alexa Developer Console, and then test it. You will NOT need to publish your test skill to the general public as part of completing this tutorial.
If you have never created an Alexa skill before you will first need to create an Amazon Developer account. You can follow the link below and quickly set one up.
Amazon Developer Services and Technologies
You will also need to set up an account with Invocable if you are a first time user.
Task Summary
- PART 1 – Create an Airtable Workspace and Base
- PART 2 – Populate the Airtable Base with Records
- PART 3 – Determine the API URL and API Key
- PART 4 – Create an Invocable Test Project
- PART 5 – Test using the Amazon Test Simulator
PART 1 – Create an Airtable Workspace and Base
For our tutorial demo, let’s imagine the business requirement is to have Alexa recite quotes, the source of the quotes (ex. A manuscript name, a speech, a newpaper article, etc.), and a location where the quotation was either spoken or published (ex. Where the speech occurred, etc.).
In your Airtable account access your dashboard. Notice that you have a default Workspace entitled “My First Workspace.”
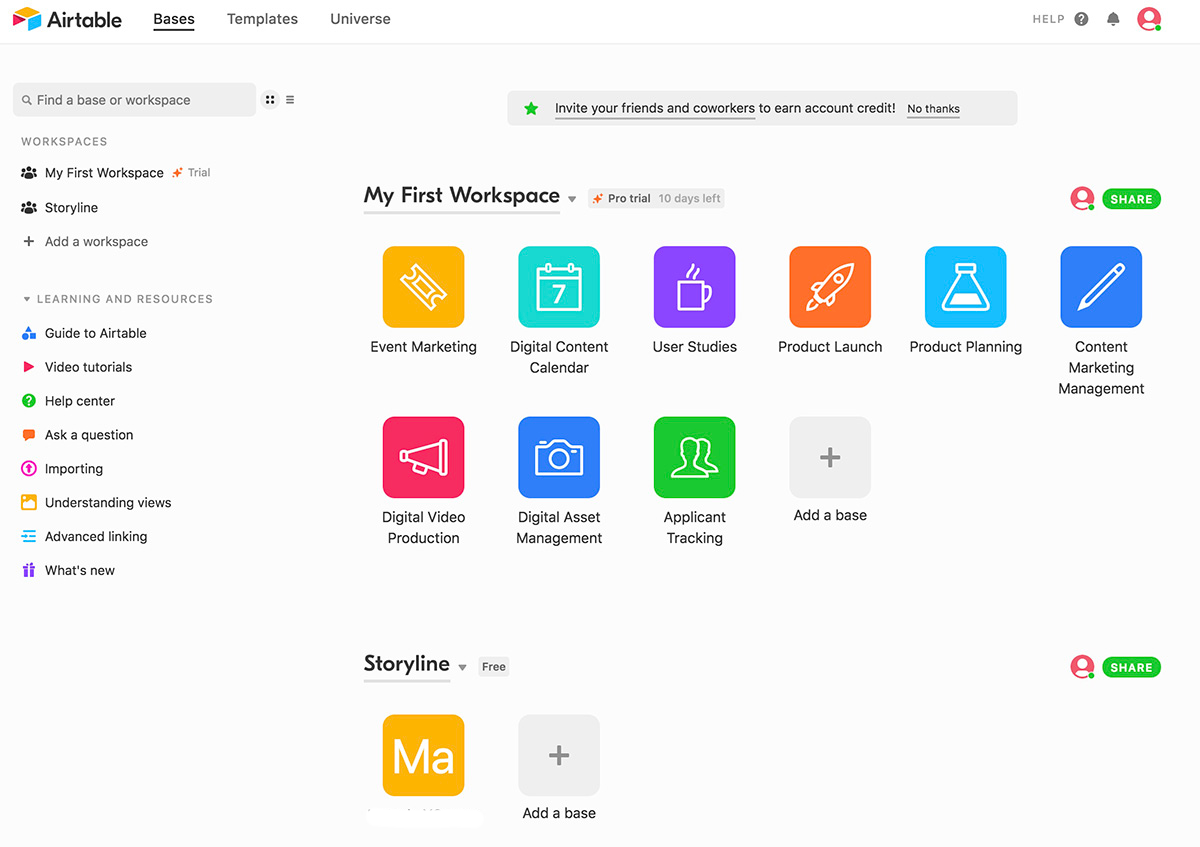
You can create a designated workspace for your Invocable projects to help keep them organized. This step is optional.
Click on “+ Add a workspace” in the left column, and add a new workspace with a name of your choosing.

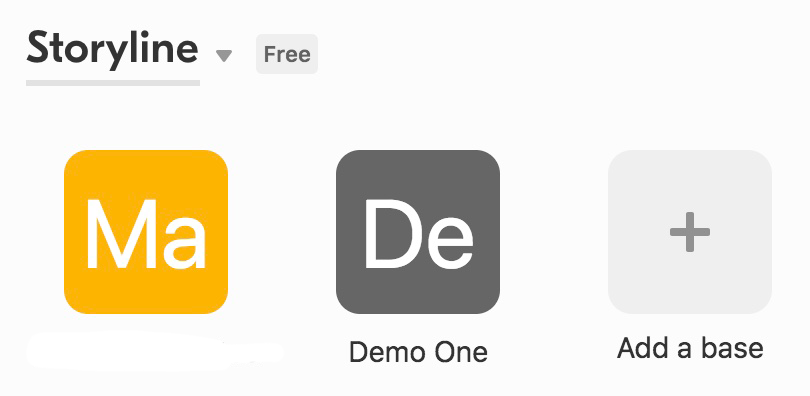
In my case, I happened to already have a “Storyline” workspace configured, and also an existing “base” (a “base” is Airtable’s shorthand for a database).
Click on the “Add a base” button to begin creating our database.
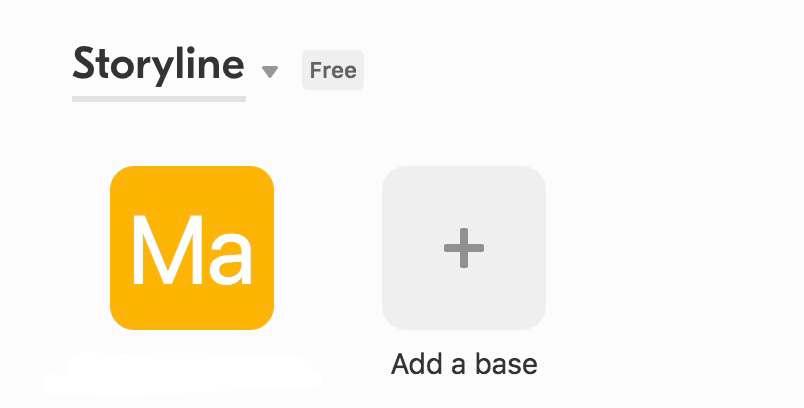
A dropdown will open. Select “Start from scratch.”

A window will open where you can name your base. For our tutorial demo I named it “Demo One’. After entering the name, press enter to close the window.
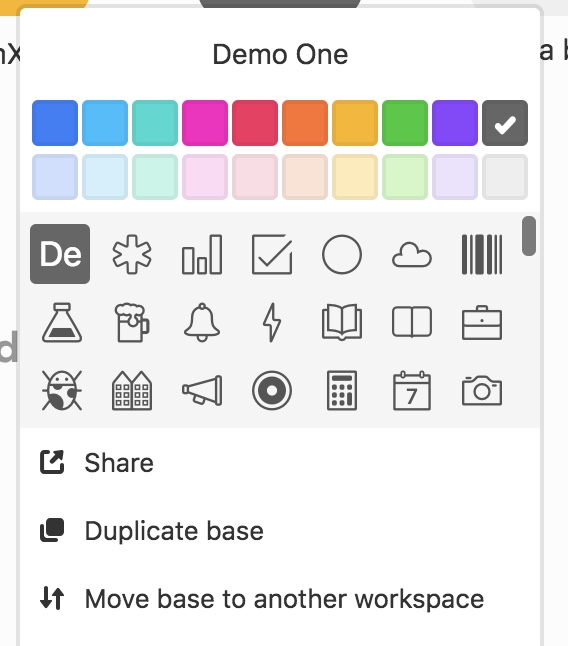
You now have a base named “Demo One”, and has a nice icon with “De” to help identify it.
Click on your new Demo One base, to open the database table. Feel free to click around a bit on the colorful icons in the lower right corner, and familiarize yourself with some of the options along the top.
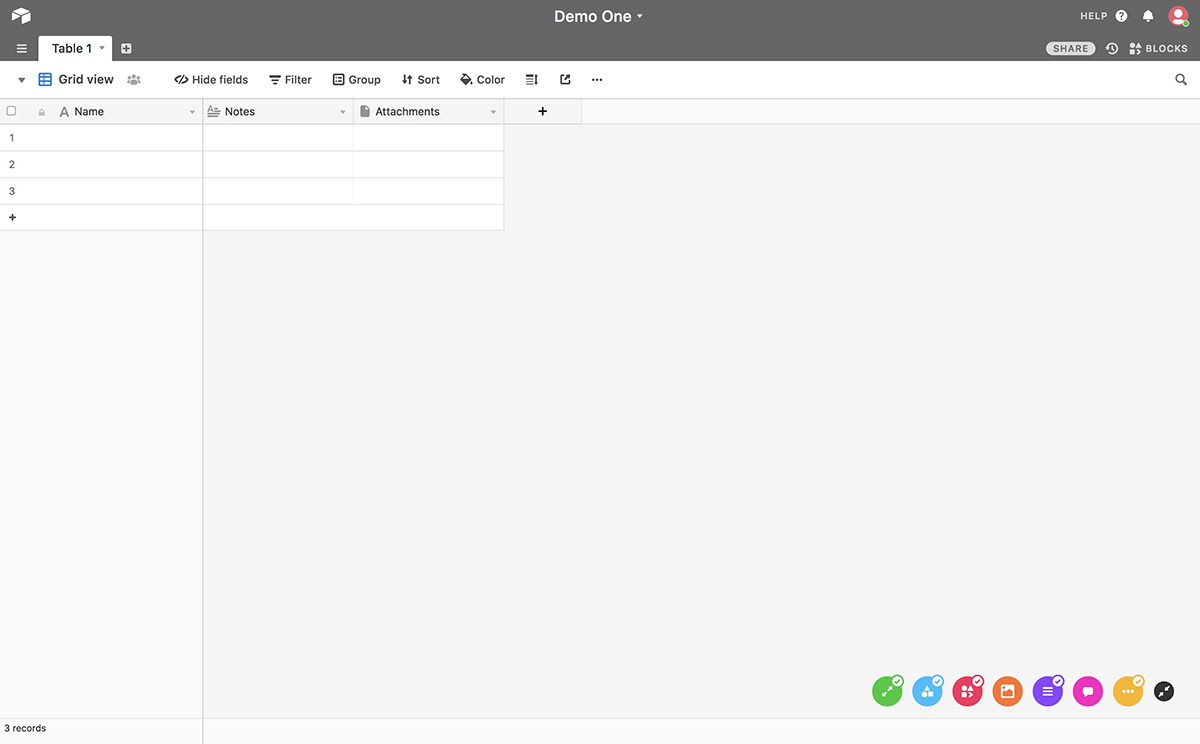
As you can see in the upper left part of the grid, the default table name is “Table 1.” Let change this to “Quotes 1” for our demo.

Twirl open the small upside down triangle next to “Table 1” to open the following pulldown menu.

Select “Rename table” from the pulldown menu. Edit and rename the tab to read “Quotes.”

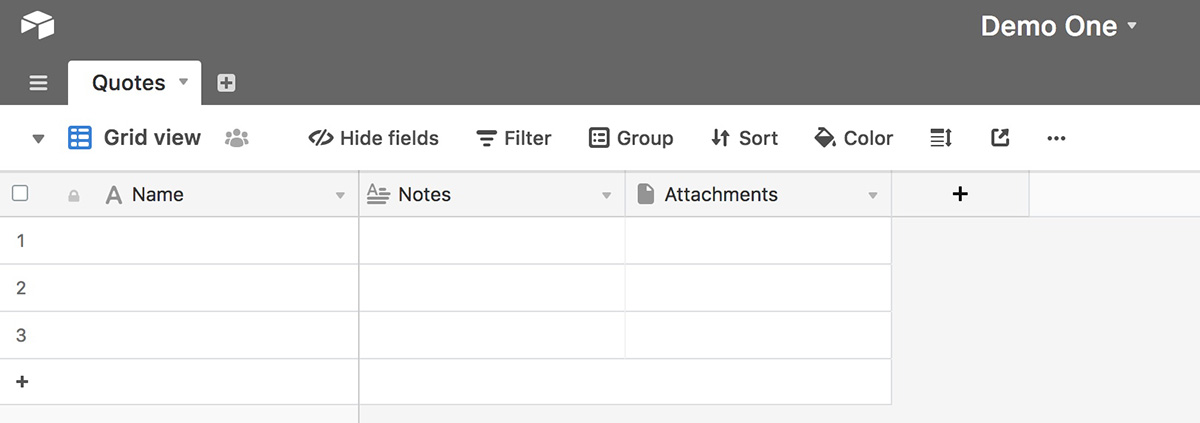
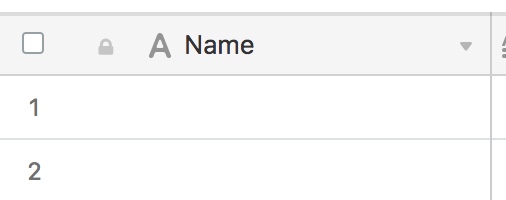
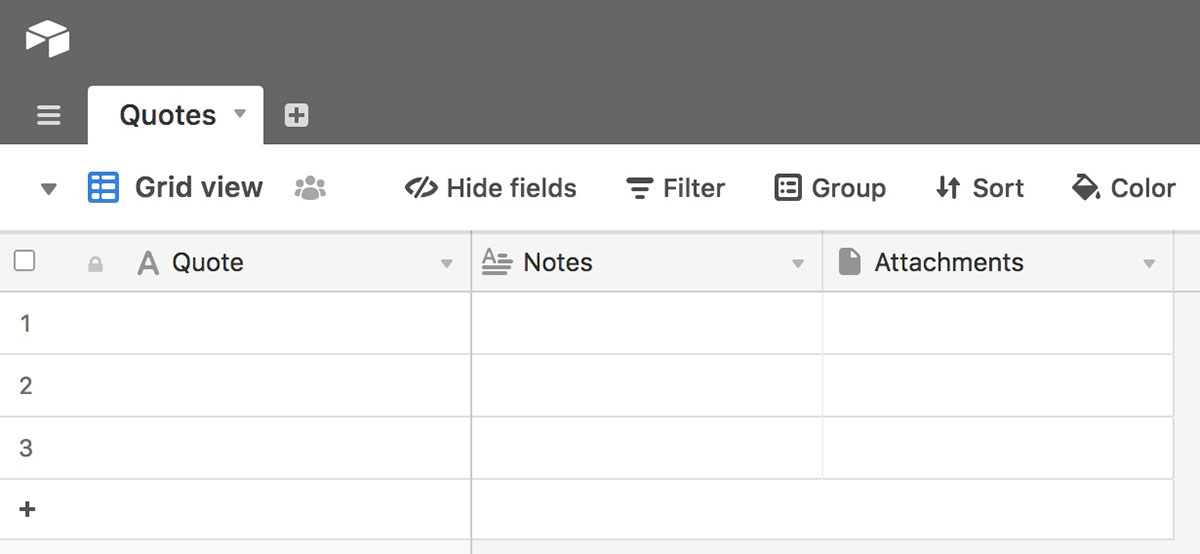
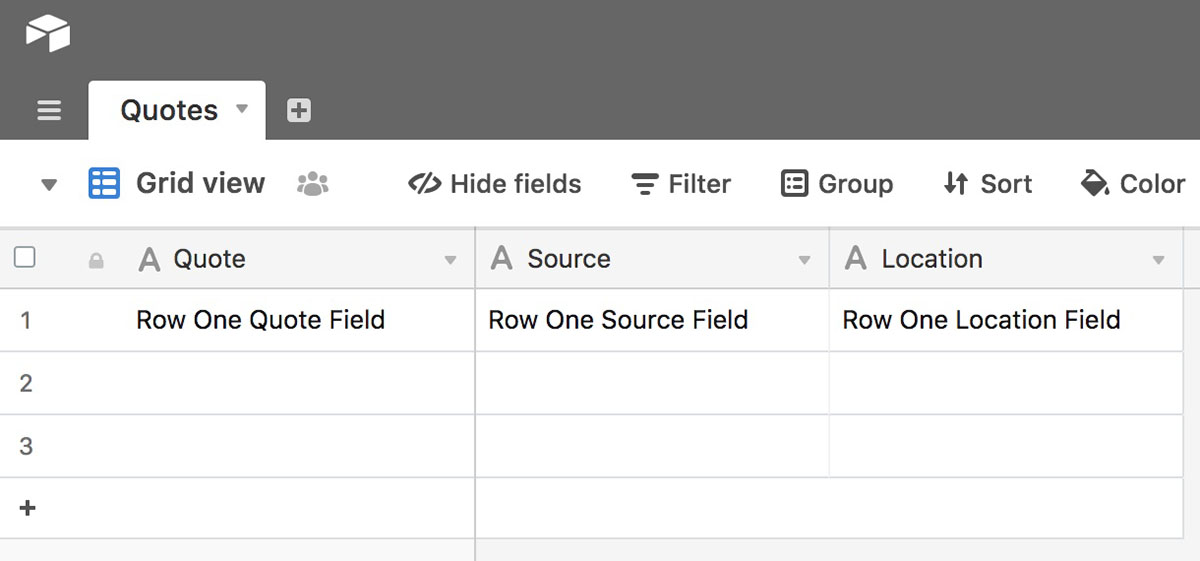
When you click out, your new table should now look like this:
Let’s review the business requirement, which is to have Alexa recite a quote, the source of the quote (ex. A manuscript name, a speech, a newpaper article, etc.), and a location (ex. Where the speech occurred, etc.).
To meet this business requirement, the three fields will be named “Quote,” “Source,” and “Location.”
As such, the design for this tutorial is to have a table with three fields and three rows of data.
Let’s proceed to change the name of the first field (reminder: “fields” are conceptually similar to columns in spreadsheets).
Twirl open the little upside down triangle just to the left of “Name” in the first column. A pulldown menu will appear.
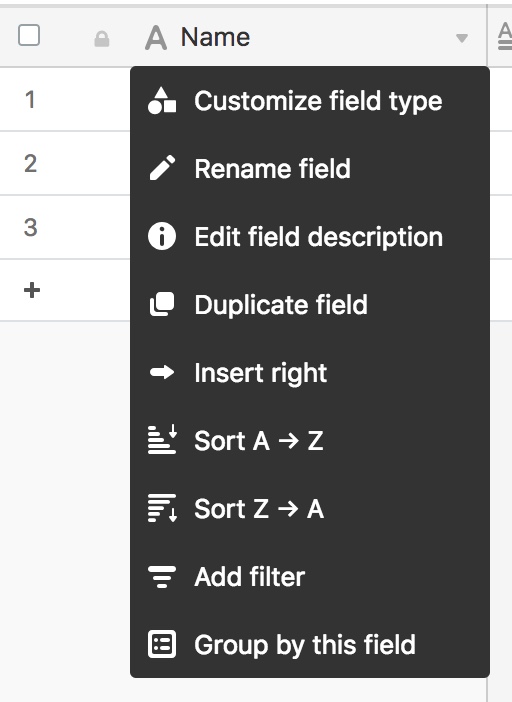
Select “Rename field” from the pulldown.

In the small window that opened, change re-name the field “Quote.” Also notice two things.
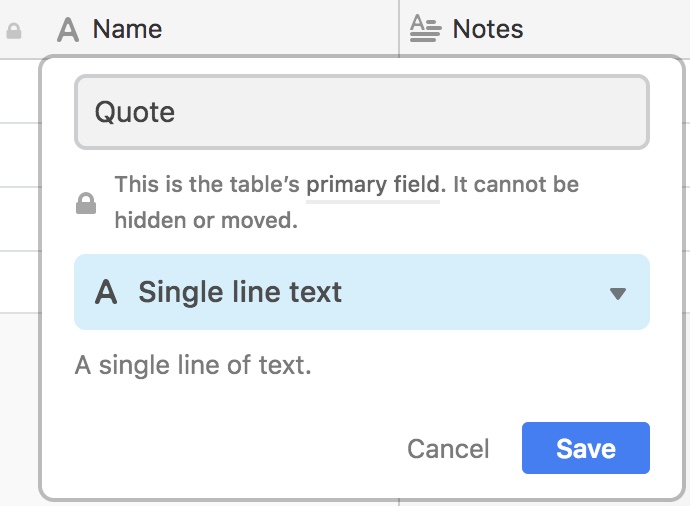
The first field is the “primary field.” This is a unique identifier of the record (row), and must be unique among all the rows. In other words, in the first field (column), the value for each row must be different. This is how the base keeps track of the various records.
If the concept of a “Primary Field” or “Primary Key” is new to you, the following Airtable reference page provides additional information. It is an important concept to understand when designing Airtable bases for your Invocable projects:
Second, notice that the “field type” is “A Single line text” in the light blue box. This is an appropriate data type for a quote. “Long text” is also a good option for longer text. If you twirl open the field type, you will see a variety of other types of data that can be stored.
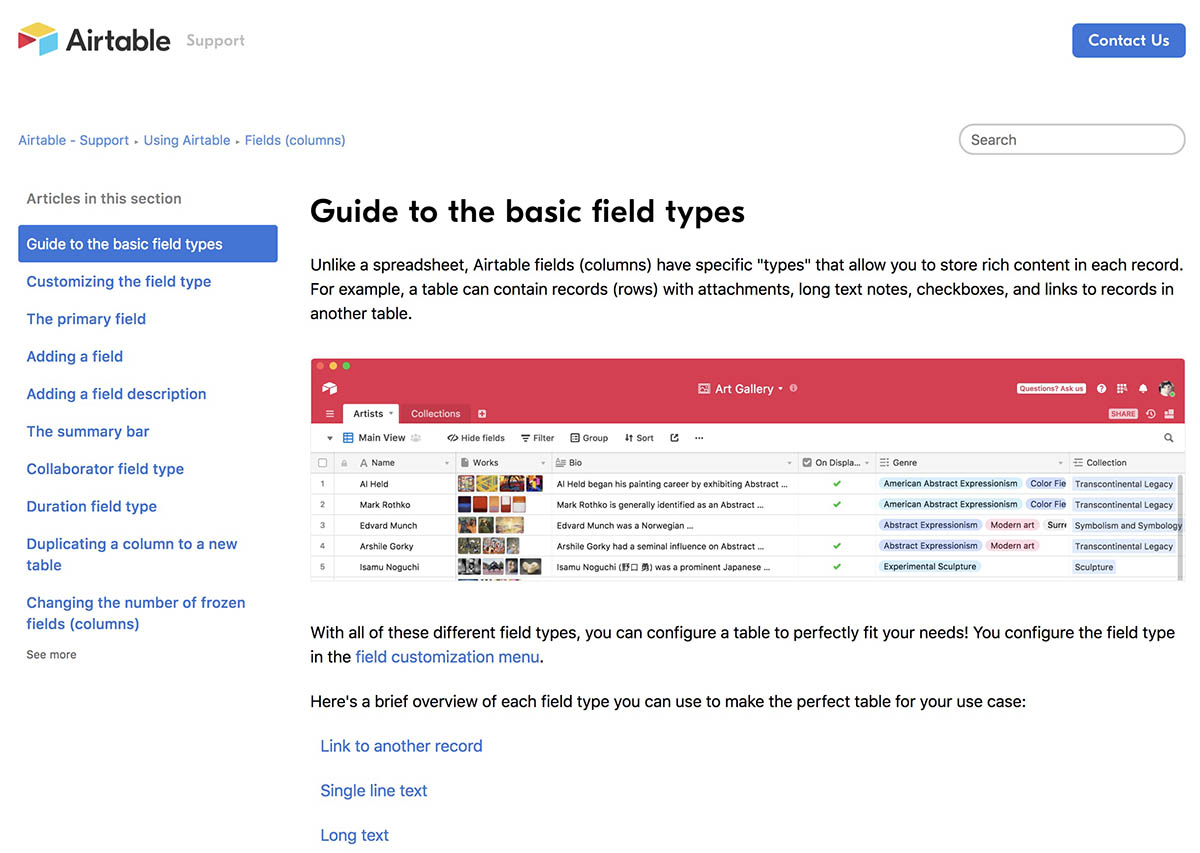
The following Airtable reference page describes the various field types:
Guide to the basic field types
After you finish editing and renaming the first field, your demo Airtable should look like this:
Let’s change the name of the second field from “Notes” to “Source.”
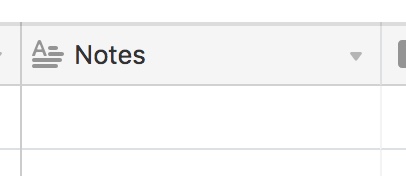
Twirl open the pulldown for the field name (column header).
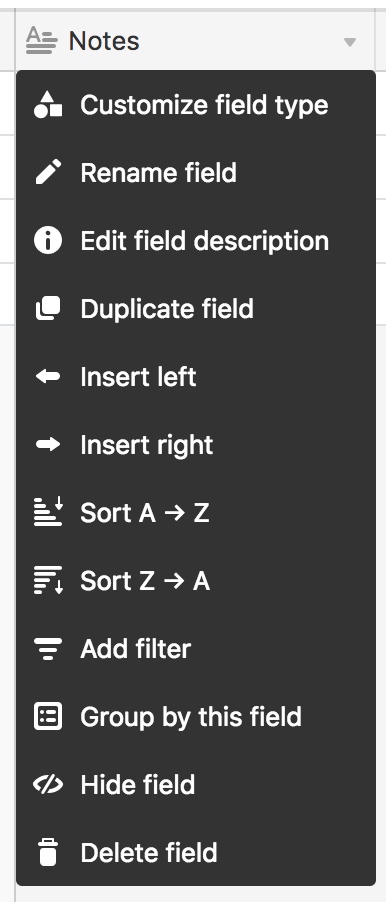
Select “Rename field.”

Here, we will change the default name from “Notes” to “Source,” but we also want to change the default field type from “Long text” to “Single line text” (“Long text” is also suitable when working with lengthier text).

First, change the name:

Then, twirl open the light blue box to see the field types.

Change from “Long text” and Select “Single line text.”

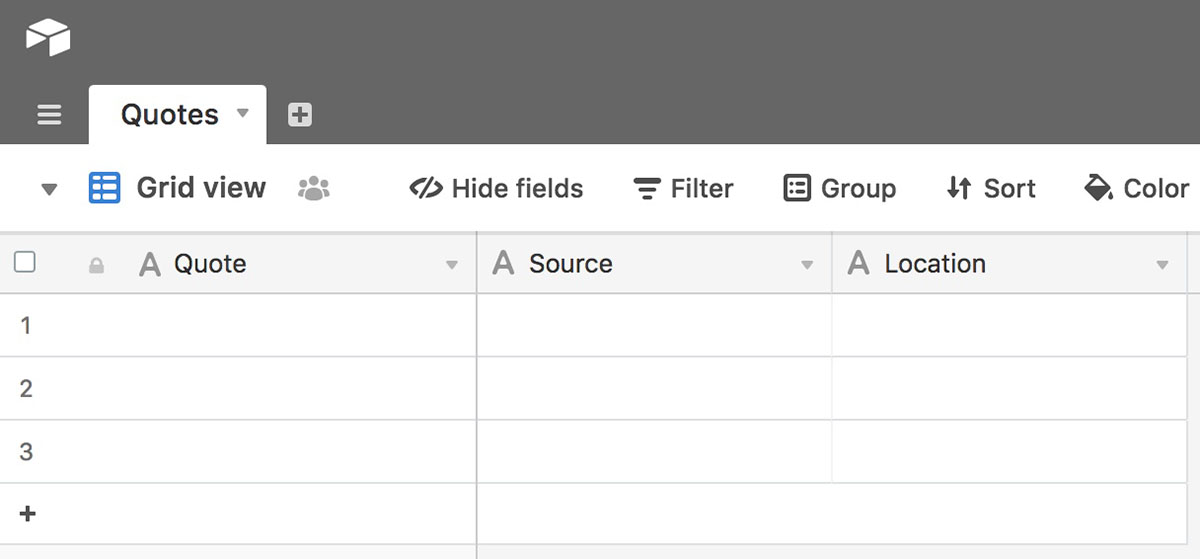
Click out of the box. At this point, the first two fields have been renamed to “Quote” and “Source.” The base should now look like this.

To complete our base, re-name the third field from “Attachments” to “Location,” and change the field type to “Single line text.” After completing these changes, your table should look like this:
Congratulations, your test demo Airtable base is now configured, and is ready to be populated with some data!
PART 2 – Populate the Airtable Base with Records
In Part 1 we configures an Airtable “base” (aka a database). The next step is to add records with quotations and interrelated information (the quote’s source, and where the quote occurred or was published).
There are numerous ways to populate the table. For example, the data can be imported from a spreadsheet.
For our demo, we are going to manually type in our records. There are only going to be three rows with three columns of test data for this tutorial.
In the table, manually type in the following test values directly into the three fields for the first row:
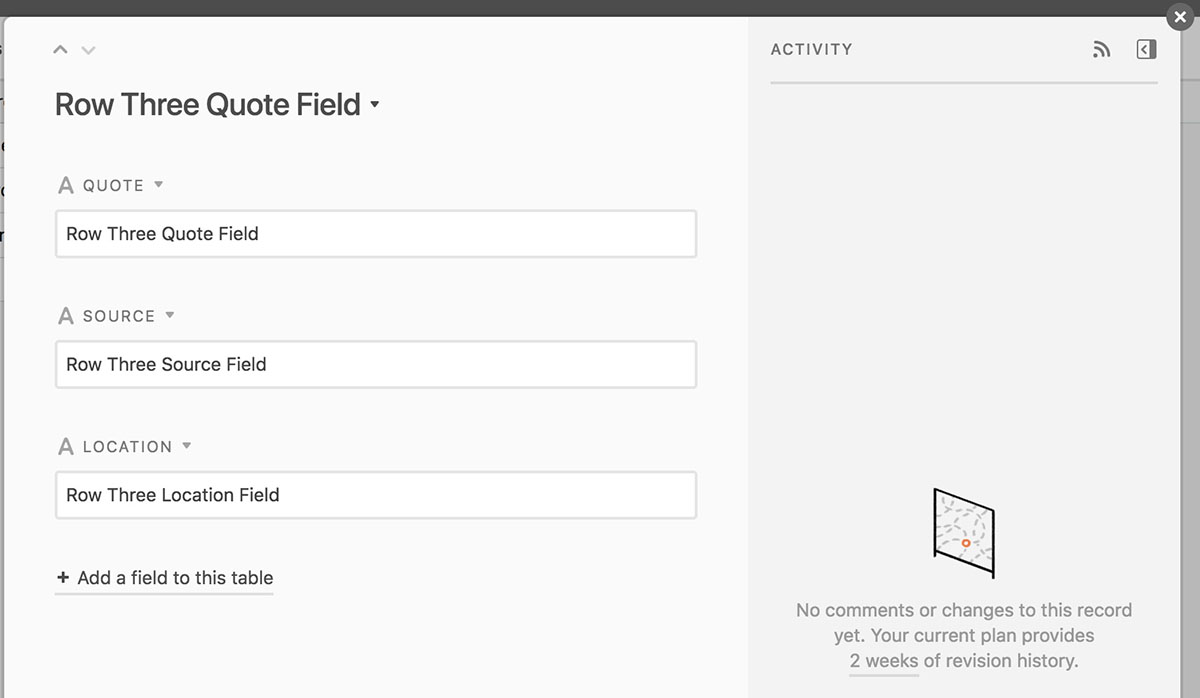
For the second row, let’s do something a little different. In the Second row, first field, notice the small diagonal icon. This is an expansion option for the field.
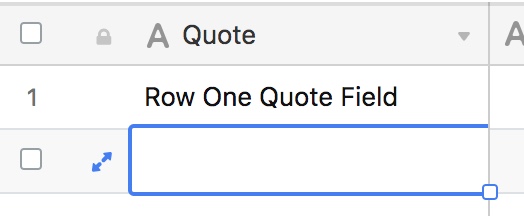
Click on the expansion icon to open up the following window for the field:
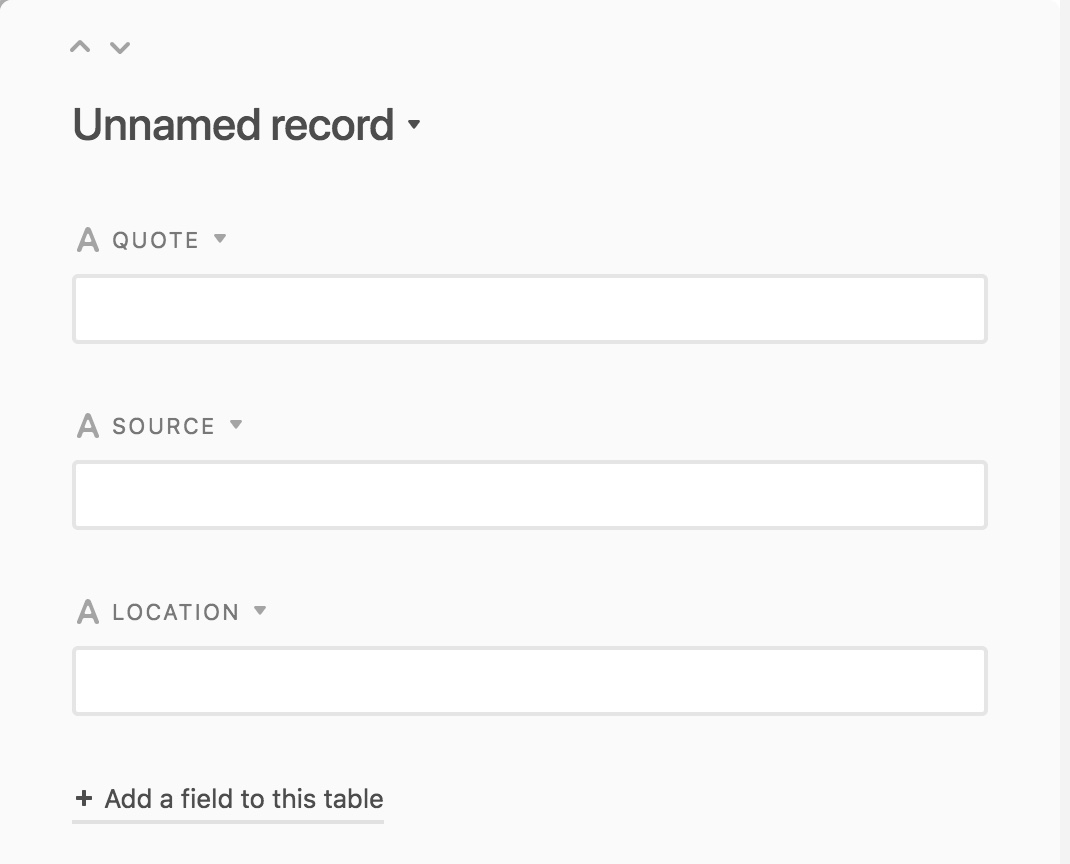
Type in the values for the second row for each of the three fields. After you finish typing in the value for the third field, do not close the window yet.
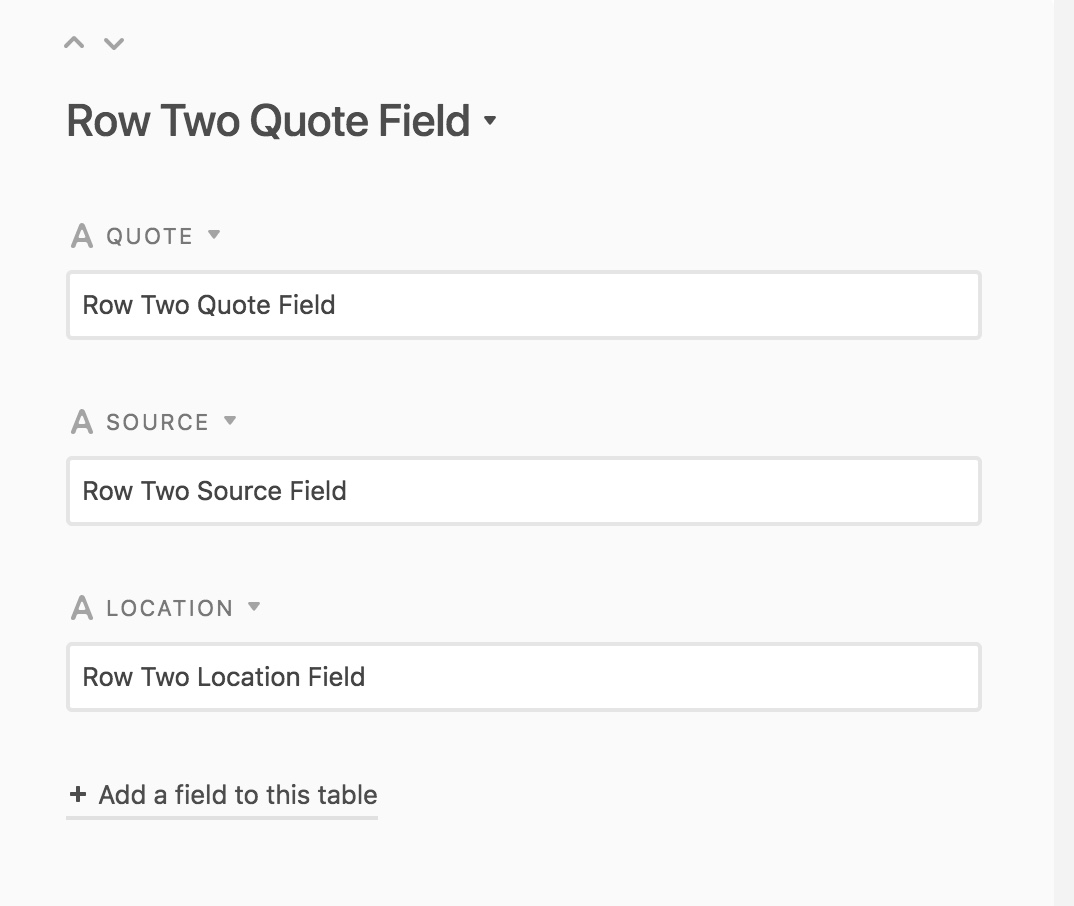
After you finish typing in the value for the third field, notice the small down-arrow icon in the upper left portion of the window.
Click on it. This will advance the window and enable you to easily enter the values for the third row. The small up and down arrows enable you to navigate among each row.
Enter the values for the third row. Once you are finished, click on the small X in the upper right corner of the window.
Upon returning to the grid view of the base, it should now look like this:
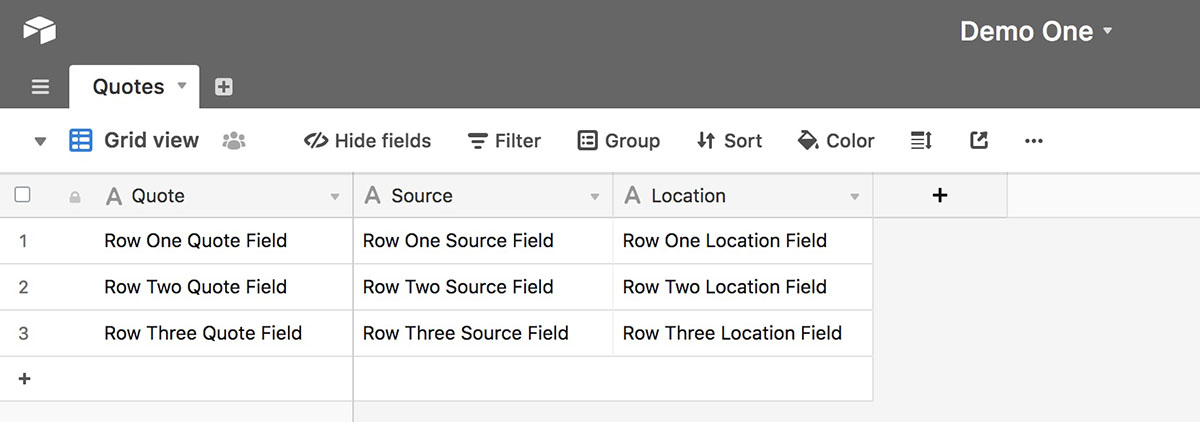
Congratulations, your test demo Airtable base is now populated with three records, with three values each! The next step is to locate and identify the API URL and the API Key.
PART 3 – Determine the API URL and API Key
An API URL is available for use to access records in our table via Invocable projects. In addition, Airtable requires the use of a secure API Key. When configuring the Integration Step in Invocable we will use both of these pieces of information.
Currently, this is what our Airtable looks like.

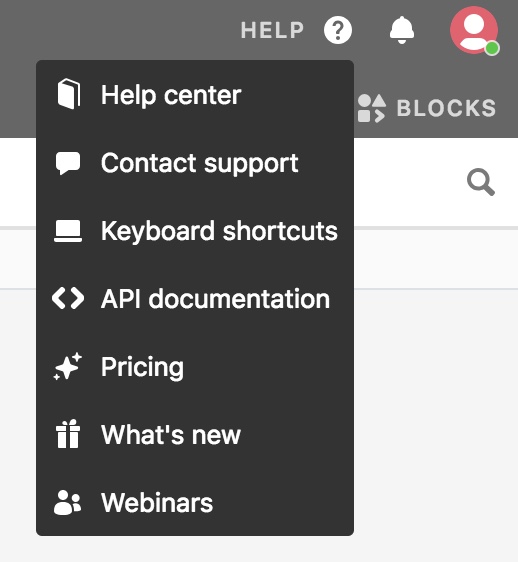
In the upper right corner of the screen, there is a HELP button (and a little circle with a question mark in it). Click one of these.

A pulldown will open up. In the pulldown, notice the selection for “<>API documentation.” Select this option.
A nice feature is that Airtable provides custom-configured API documentation for each table. As you recall, we named our table “Demo One.” As such, the API Documentation is conveniently named “Airtable API for ‘Demo One'”.
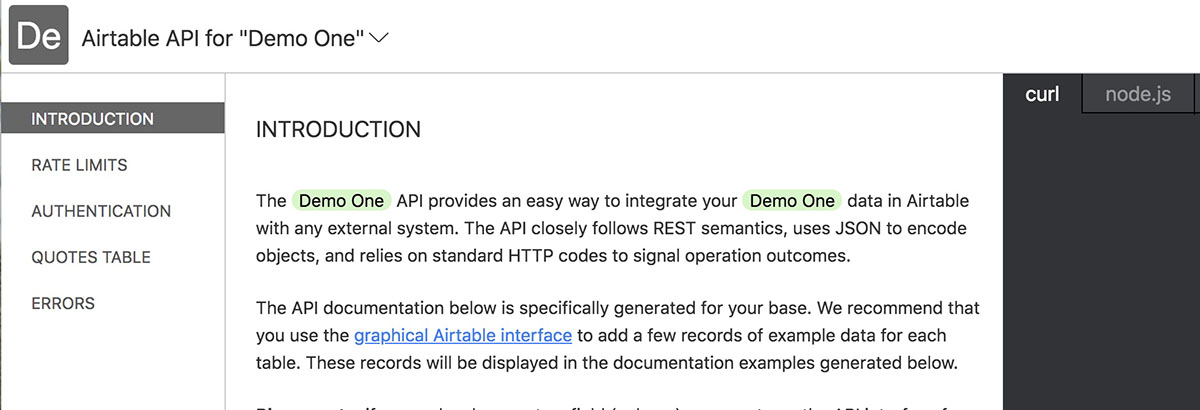
Review the menu options in the upper left panel. Currently we are in the “INTRODUCTION” section.
Click on the selection for “QUOTES TABLE.” Be aware that these API documents are customized, and that “Quotes” is the name of our base. Upon clicking QUOTES TABLE, a submenu will open up.

In the submenu, click on the selection for “List records.” In this screen, a lot of information is provided in the middle part of the screen regarding the fields and how they work as parameters.
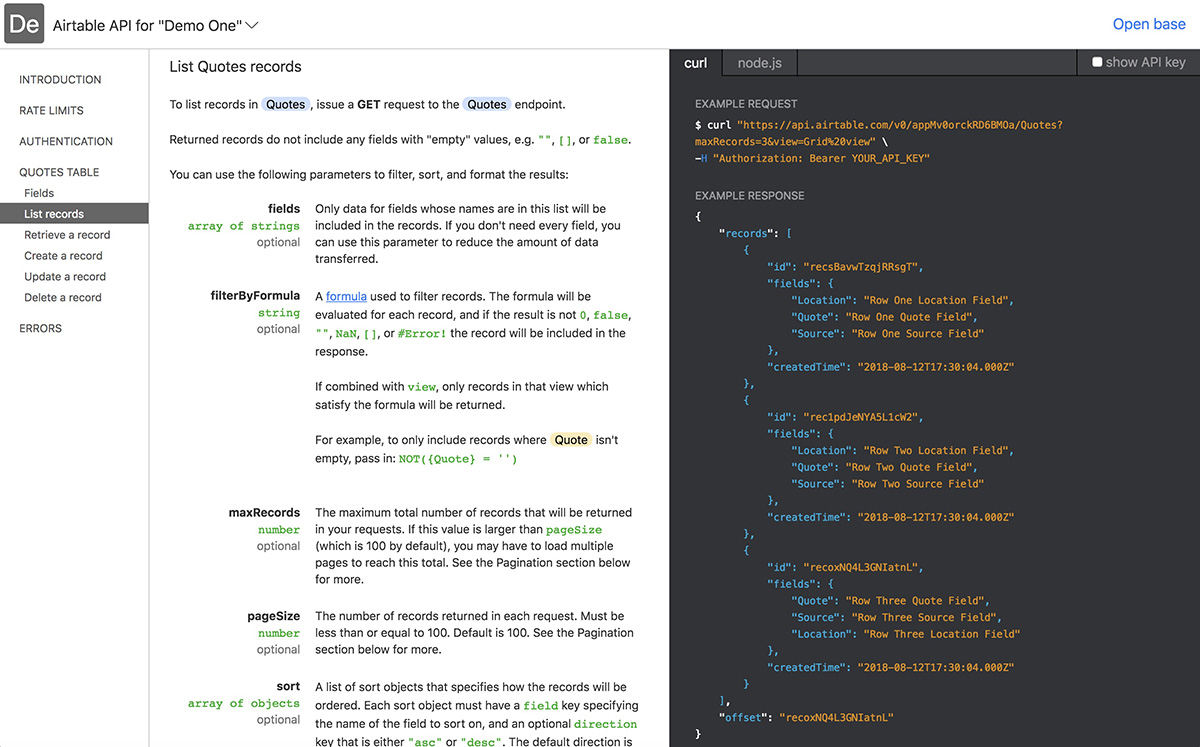
Let’s focus on a couple key pieces of information in the EXAMPLE REQUEST section on the right half of the screen:
- The “curl” tab in the upper left corner is pre-selected by default. This page provides the URL we are going to use.
- The first two rows identify the https request URL we are going to use.
- The third row begins with a blue “H” (which stands for “Header”). This row identifies the API authorization which will be used in the API Request. Initially, a part of it will display as “YOUR_API_KEY.” This will be replaced by your personal API Key as we proceed with the configuration. This bit of information is strongly encouraged by Airtable to be kept private.
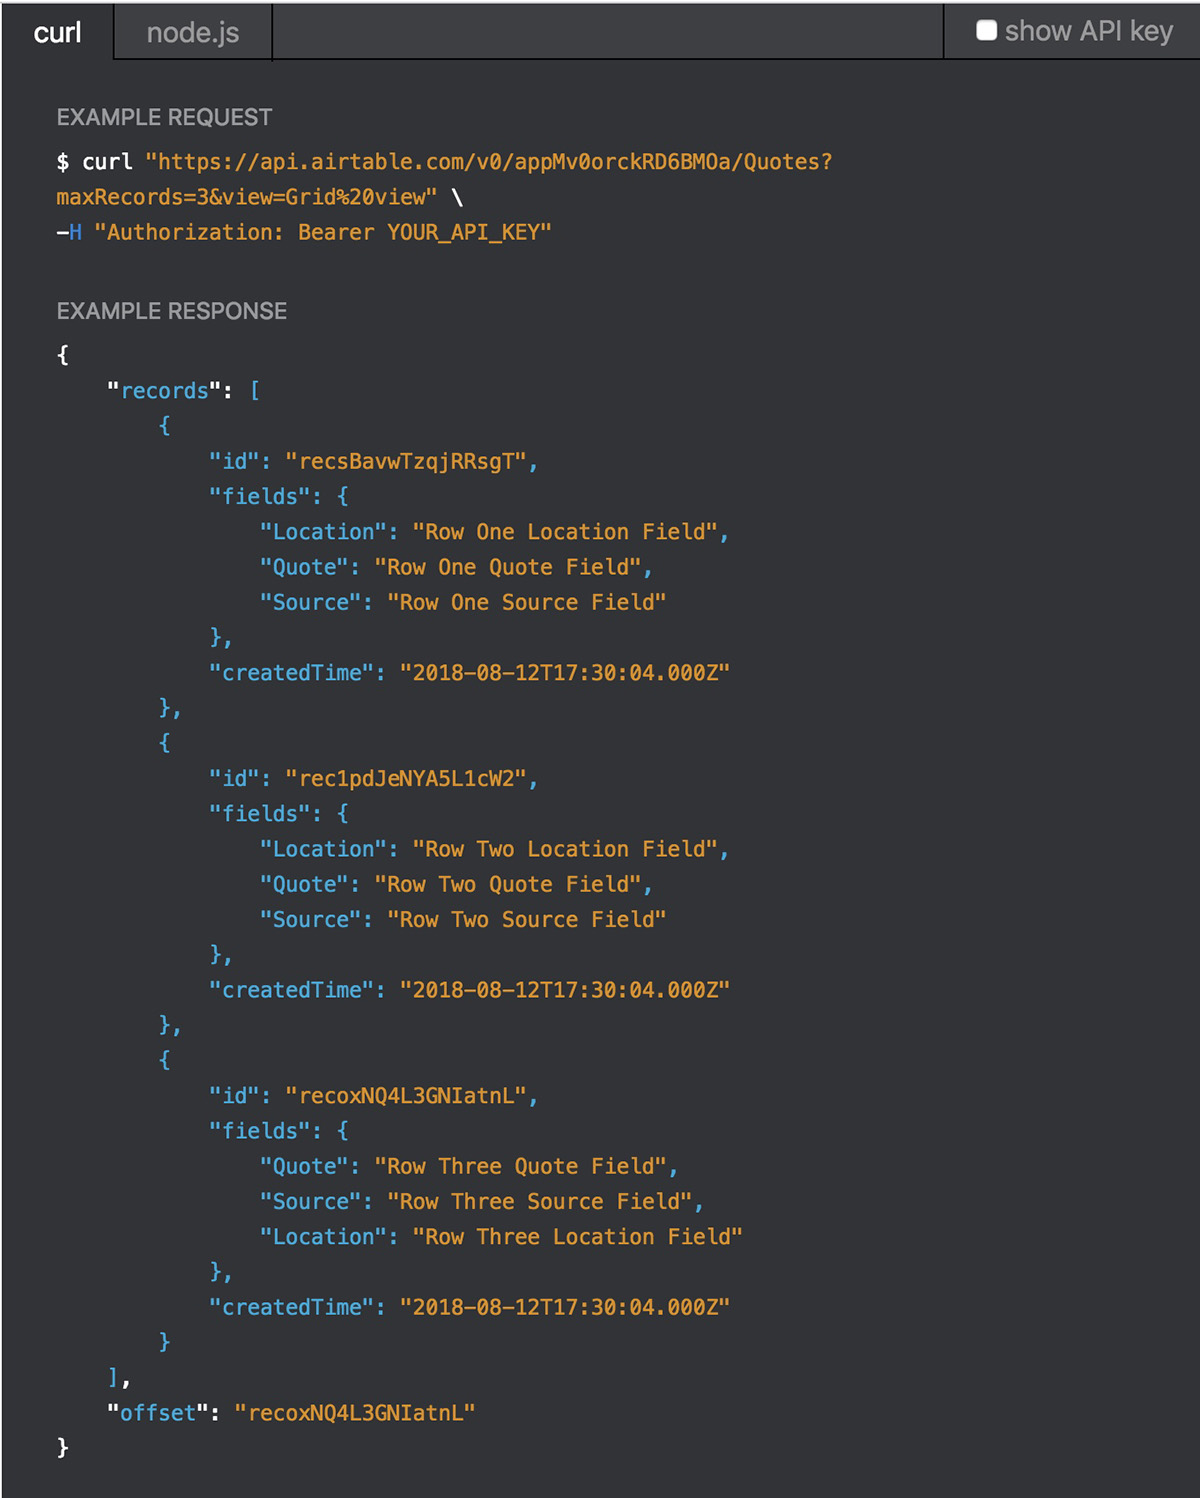
- If you review the tree structure in the EXAMPLE RESPONSE you will see our data.
- Some key terms to note are “records” and “fields.” These will be used when configuring our Invocable Integration Step, as these provide a path to the data within the tree structure.
- Also note our three field names, “Location,” “Quote,” and “Source.” These will also be included in the API response statements.
- To summarize, these details will be used later when configuring the Integration Step for the variable assignments our Invocable test project.
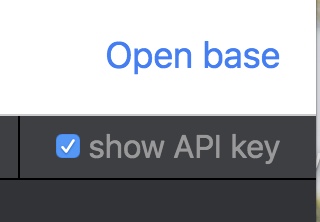
If you look in the upper right corner of the screen, you will notice a checkbox for “show API key.” Initially this is unchecked by default.
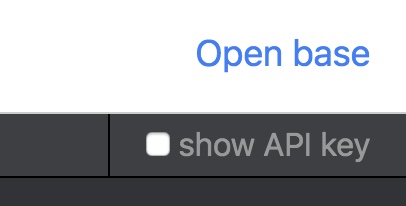
Your personal API key will be needed to configure the header portion of your Integration Step in Invocable. This is what provides authorization for your Alexa skill to access your tables. There are two ways to obtain your API Response Key.
- One way is to go back to your personal account in Airtable and plan to copy/paste it from there. In those screens you also have the option to regenerate your API key, if you feel it is necessary.
- The second way is to click the checkbox. For this tutorial, this is left unchecked, however you may want to go ahead and check the checkbox so that you will have your API Key available for configuration of the Integration Step in your Invocable project.
Let’s take a closer look at the URL. This will need to be copied and pasted from here, to your Invocable Integration Step configuration. The Authorization will be needed as well.

To summarize, what you need to copy and paste are these two items from this screen. Again, the YOUR_API_KEY portion for the authorization will be updated to reflect your actual API Key:
URL:
https://api.airtable.com/v0/appMv0orckRD6BMOa/Quotes?maxRecords=3&view=Grid%20view
NOTE: In the above URL, the maxRecords is set to 3, which matches the number of records we plan to retrieve for our test. You will need to double check and adjust this value for your other projects.
HEADER:
Authorization: Bearer YOUR_API_KEY
You can either keep the API documentation page open, for direct copying and pasting these two statements into your Invocable project, or you can copy and paste these into your design document.
Congratulations, we now have our base ready and the API information we need! We are ready to proceed and create a test Invocable project for accessing your Airtable information.
PART 4 – Create an Invocable Test Project
Let’s proceed to create a very simple project and practice integrating an Airtable base as your datasource. This demo skill will be uploaded to Alexa in the Amazon Developer Console for testing our results, but will not be published.
First log into your account.
In your project dashboard, you will see lists of projects in one or more vertical columns. Lists help keep your projects organized. Click the “Create Skill” button at the bottom of one of your lists
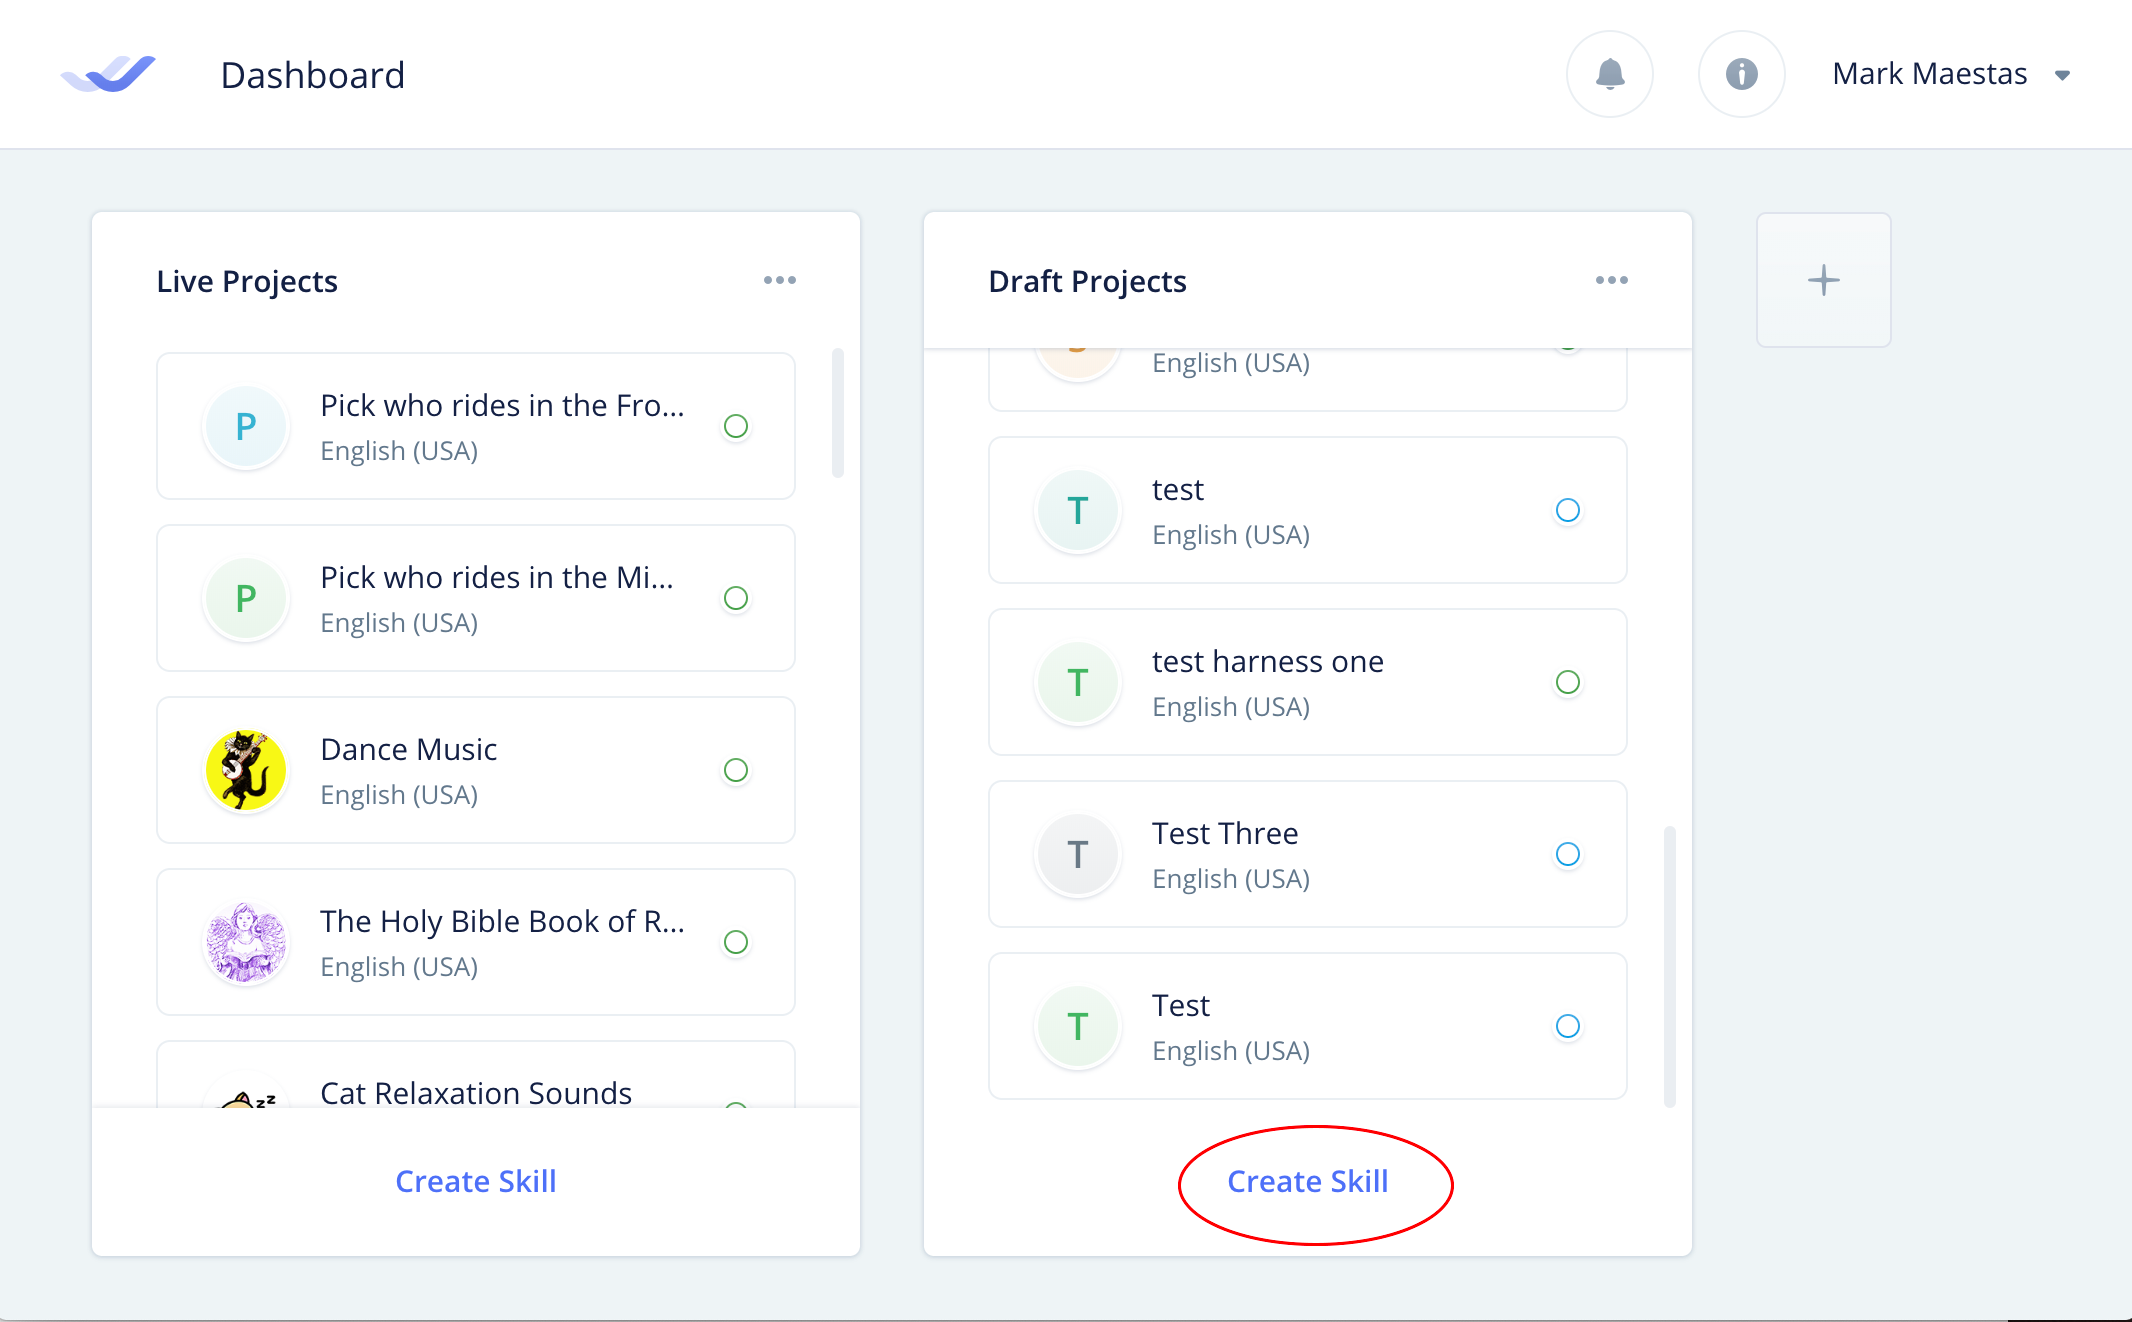
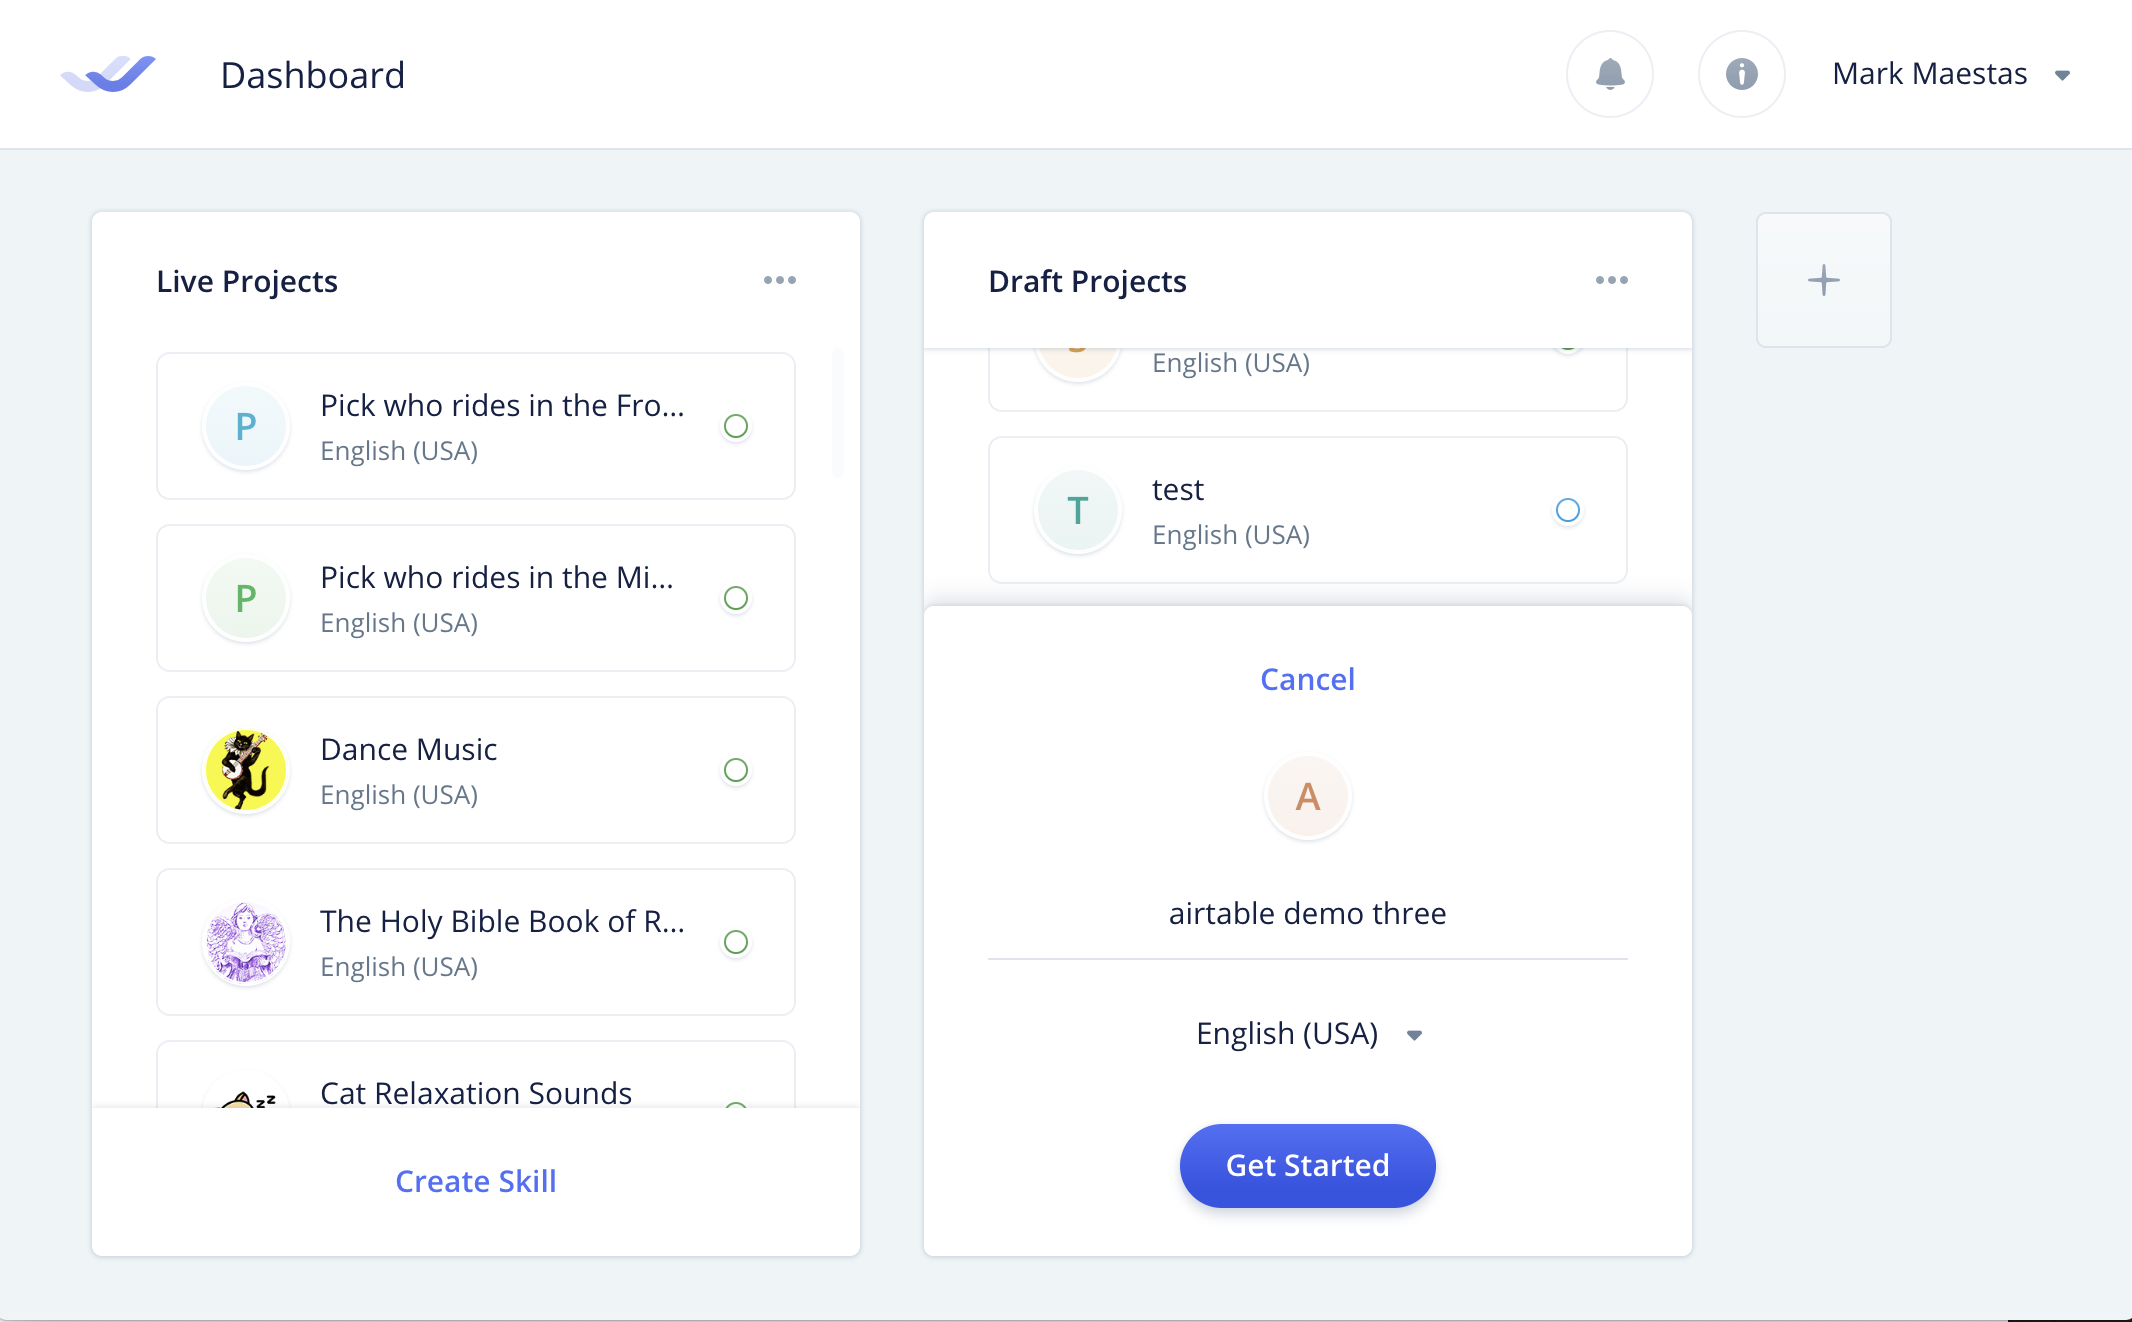
A preliminary project window will open, where you can enter your skill name and choose the language/region.

In the project name window, enter your skill name. For this demo project, we named it “airtable demo three.” This will also be your invocation name when testing. The letters should be all lowercase.
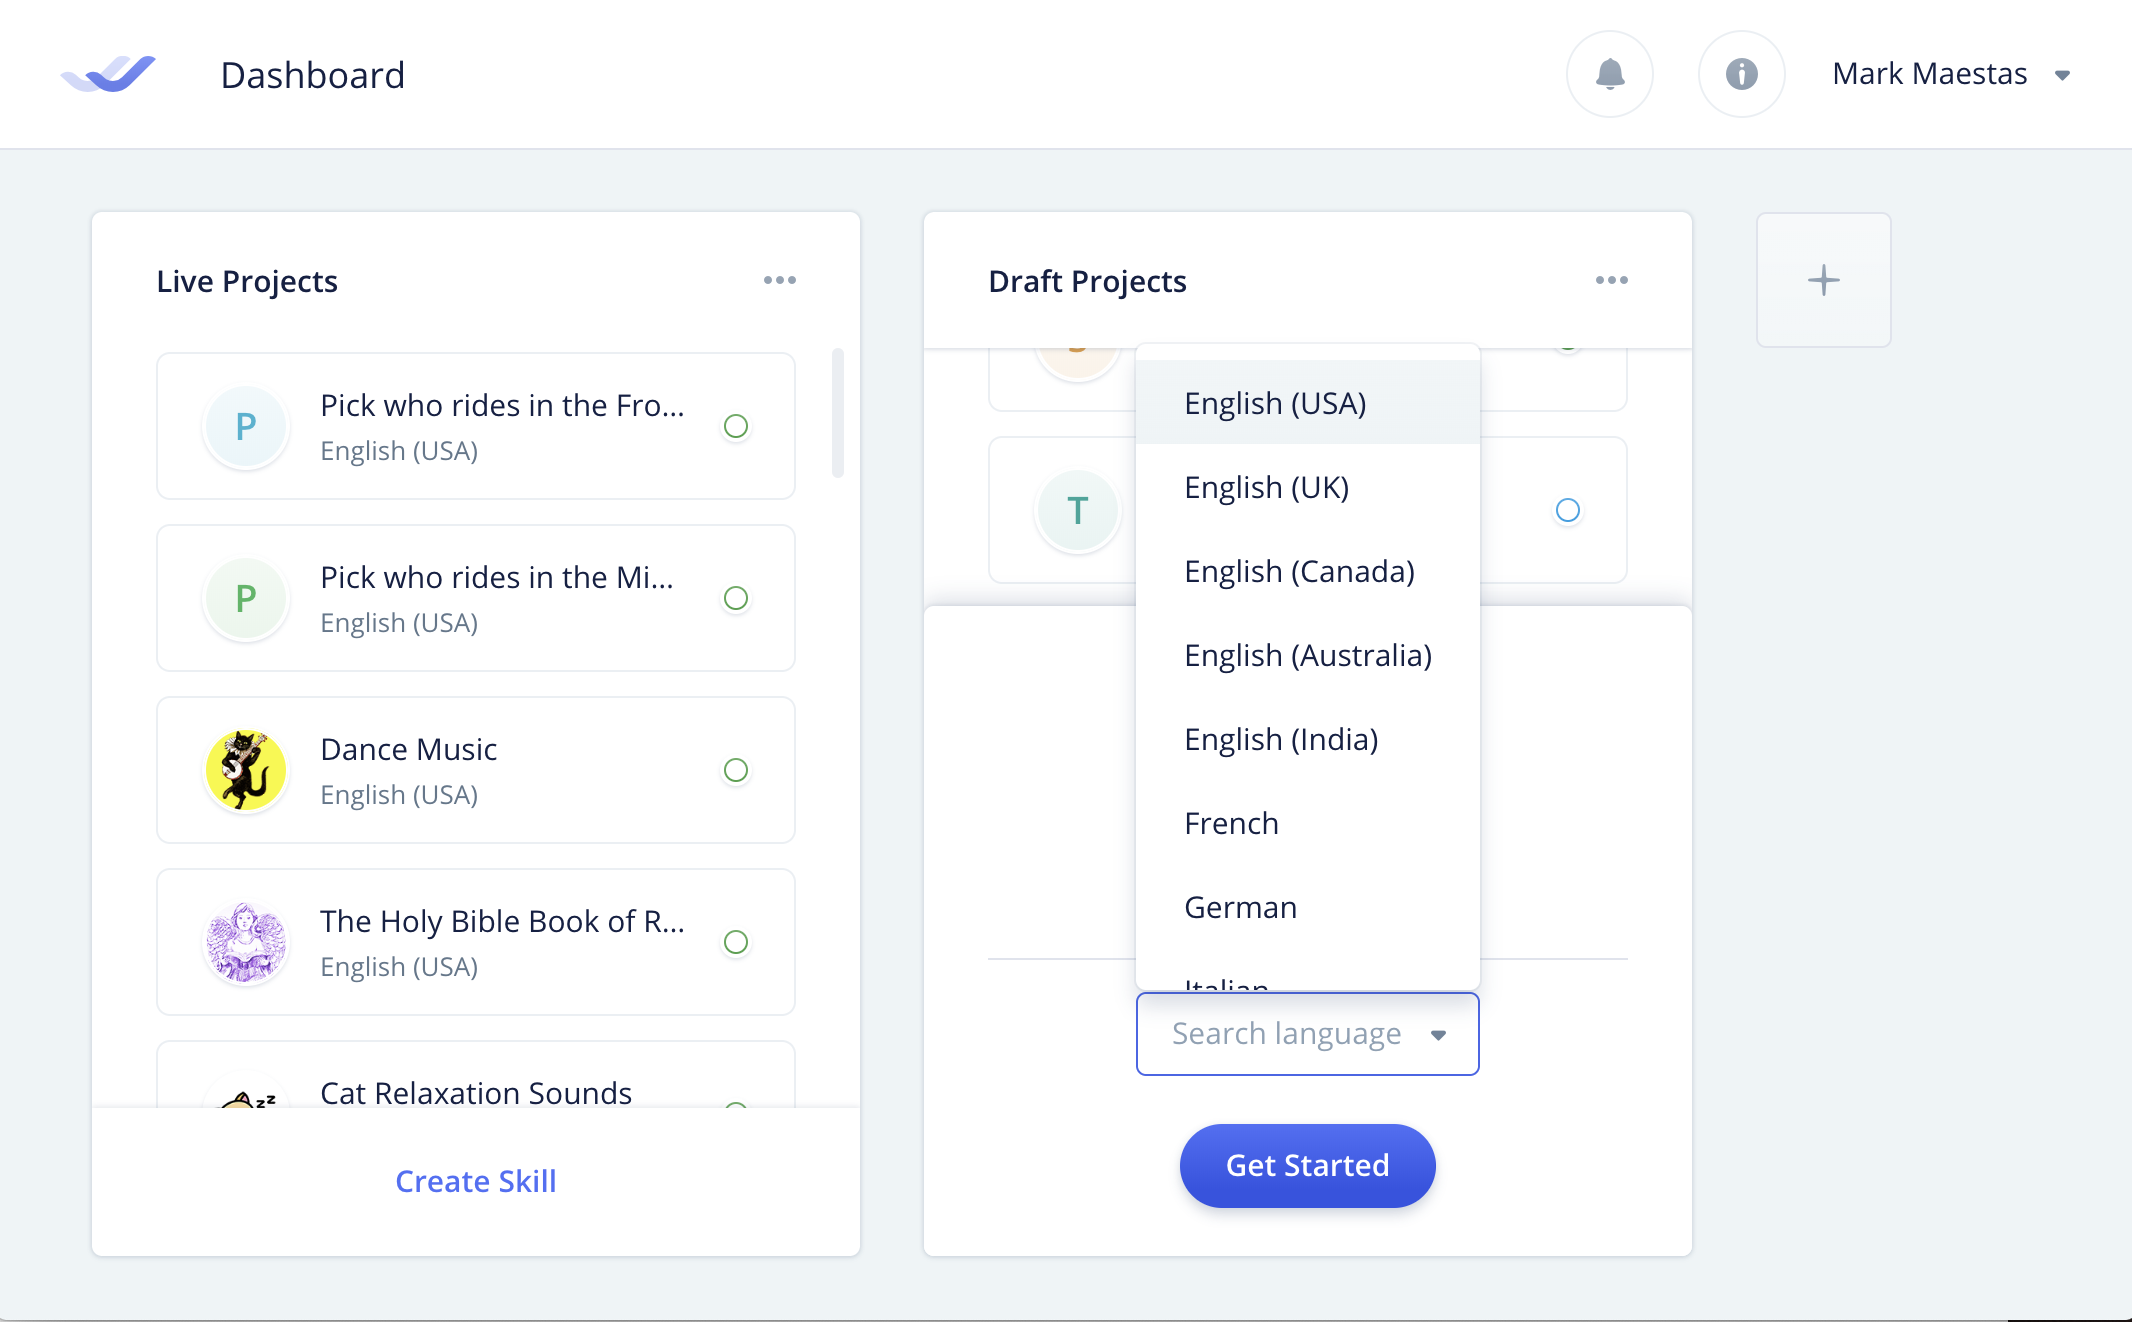
The English (USA) Language/Region is pre-selected by default. You can optionally change this to a different Language/Region, depending on where you are located and how your Amazon Developer account is configured. To see the options, twirl open the small triange next to “English (USA).”
Press the blue Get Started button to proceed.

The image below is what the default Invocable project canvas looks like for a new project.
Click anywhere on the Welcome Block to open it.
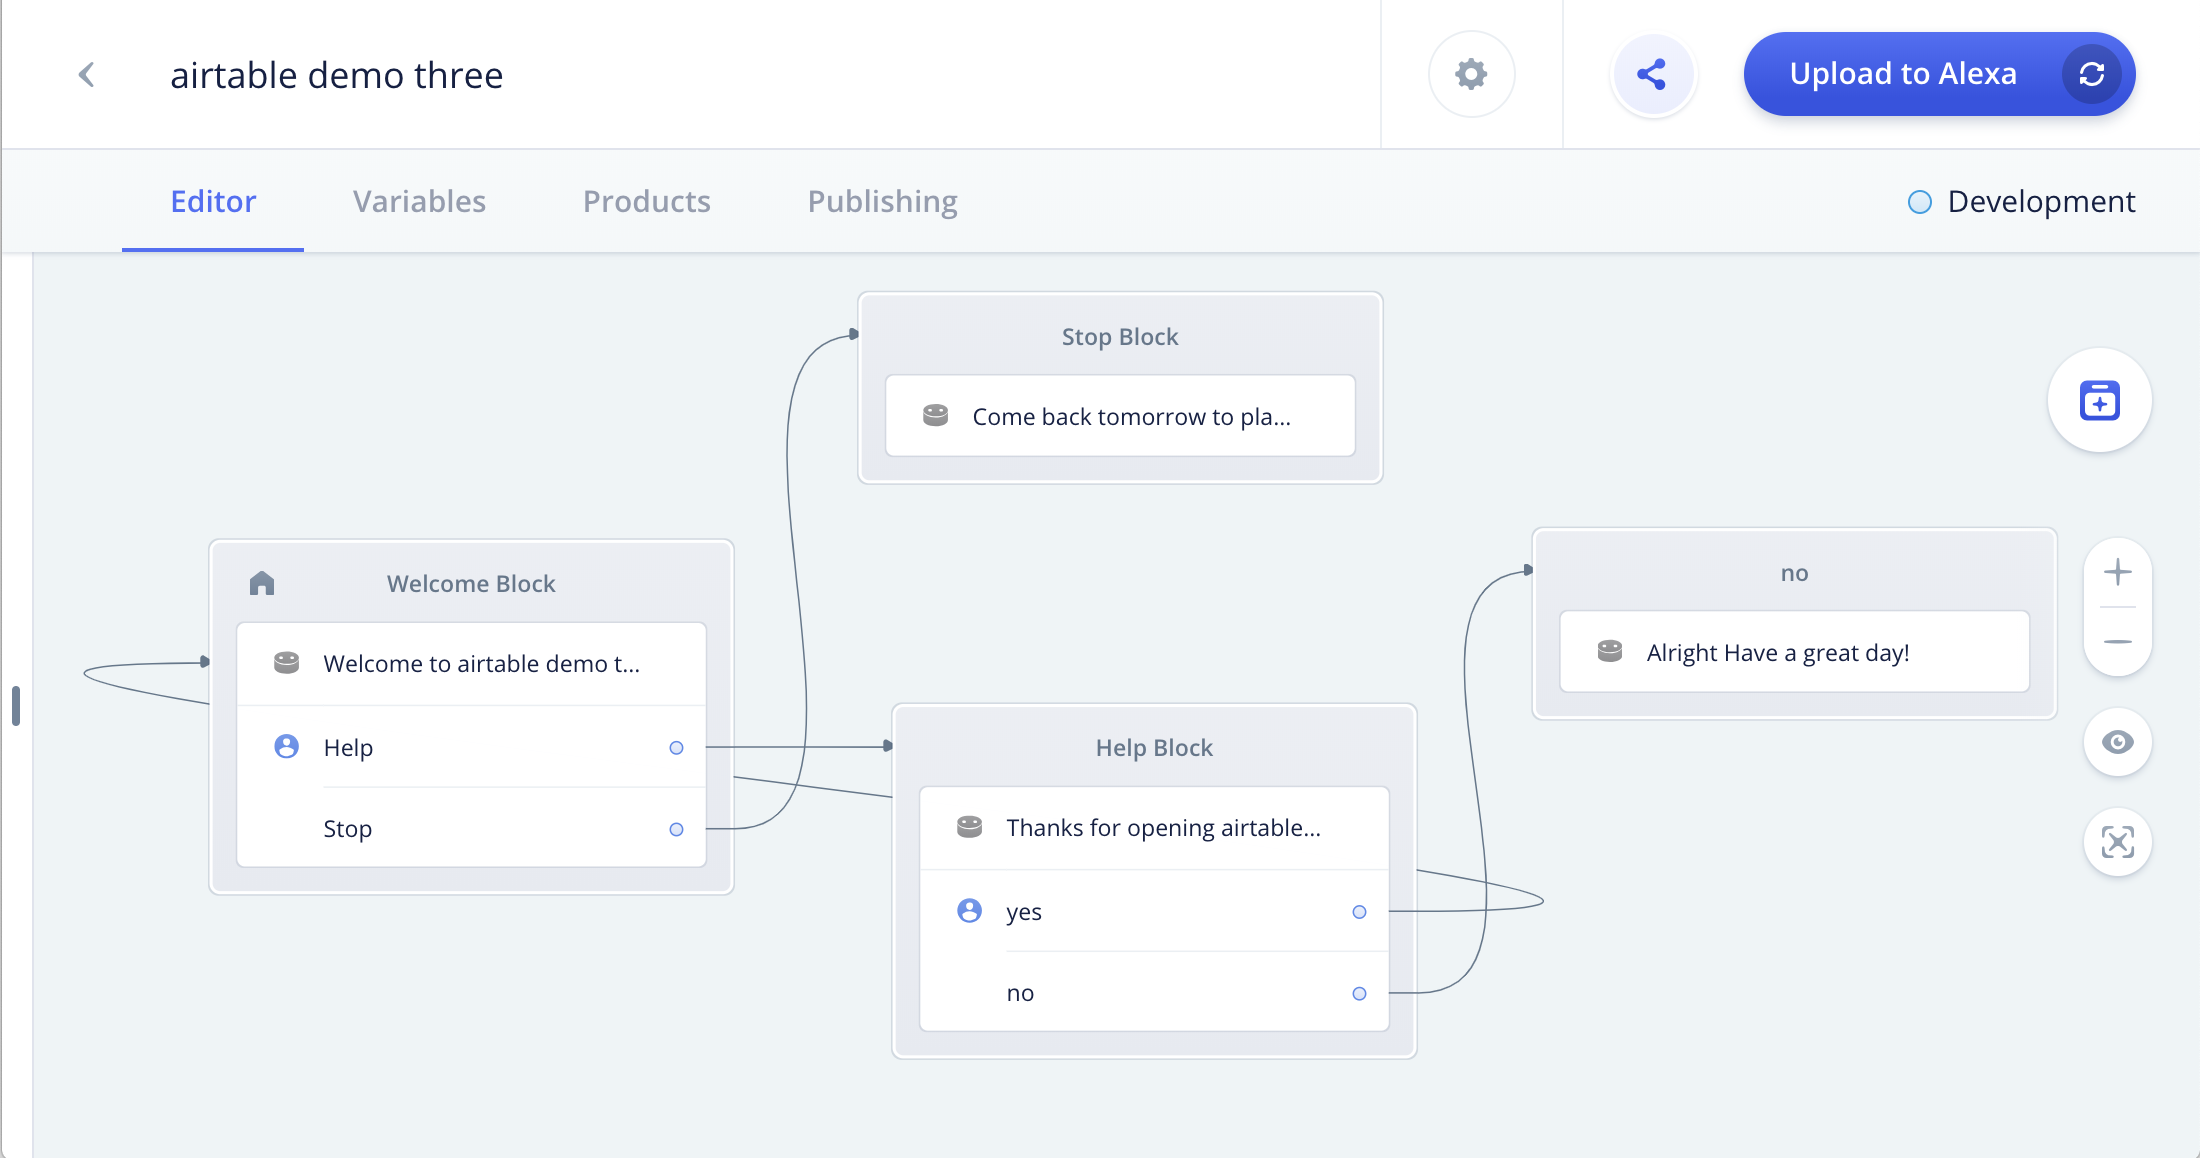
This is what the default Welcome Block looks like when opened.

In the Welcome block, notice the icon for the Help User Reply step, and the lack of an icon for the Stop step. They are both user replies. A feature of the User Interface (UI) is that the icons in the left side of the block are not duplicated when there are multiple concurrent steps of the same type. This applies for the other types of steps as well.
Let’s begin adding the Integration Step to the Welcome Block. This is what we will use to connect the Invocable project to the Airtable and retrieve values from the Airtable into variables.
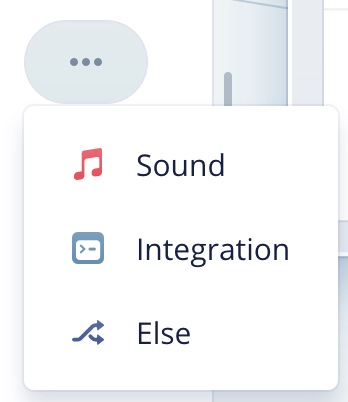
In the lower right corner of the block, you will see an oval with three dots in it. click on it to open it up and view the options.

Here, you will see three options. Click on the “Integration” button to begin creating an Integration Step for the API.
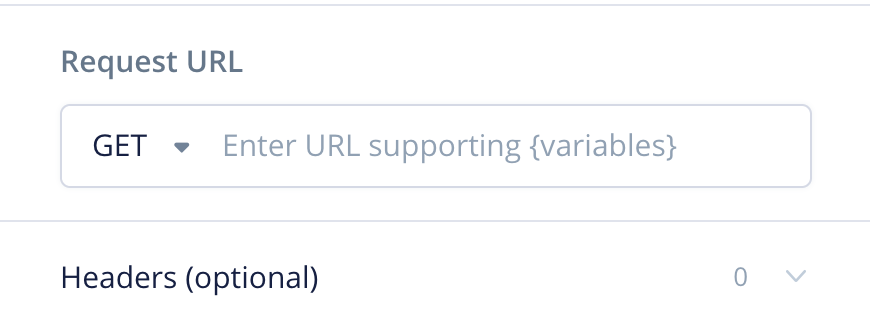
The Integration Step will open up, and as you can see, there are quite a few fields. Don’t worry, as we will go through each of them during this tutorial.
Notice the GET selection should already be pre-selected by default.
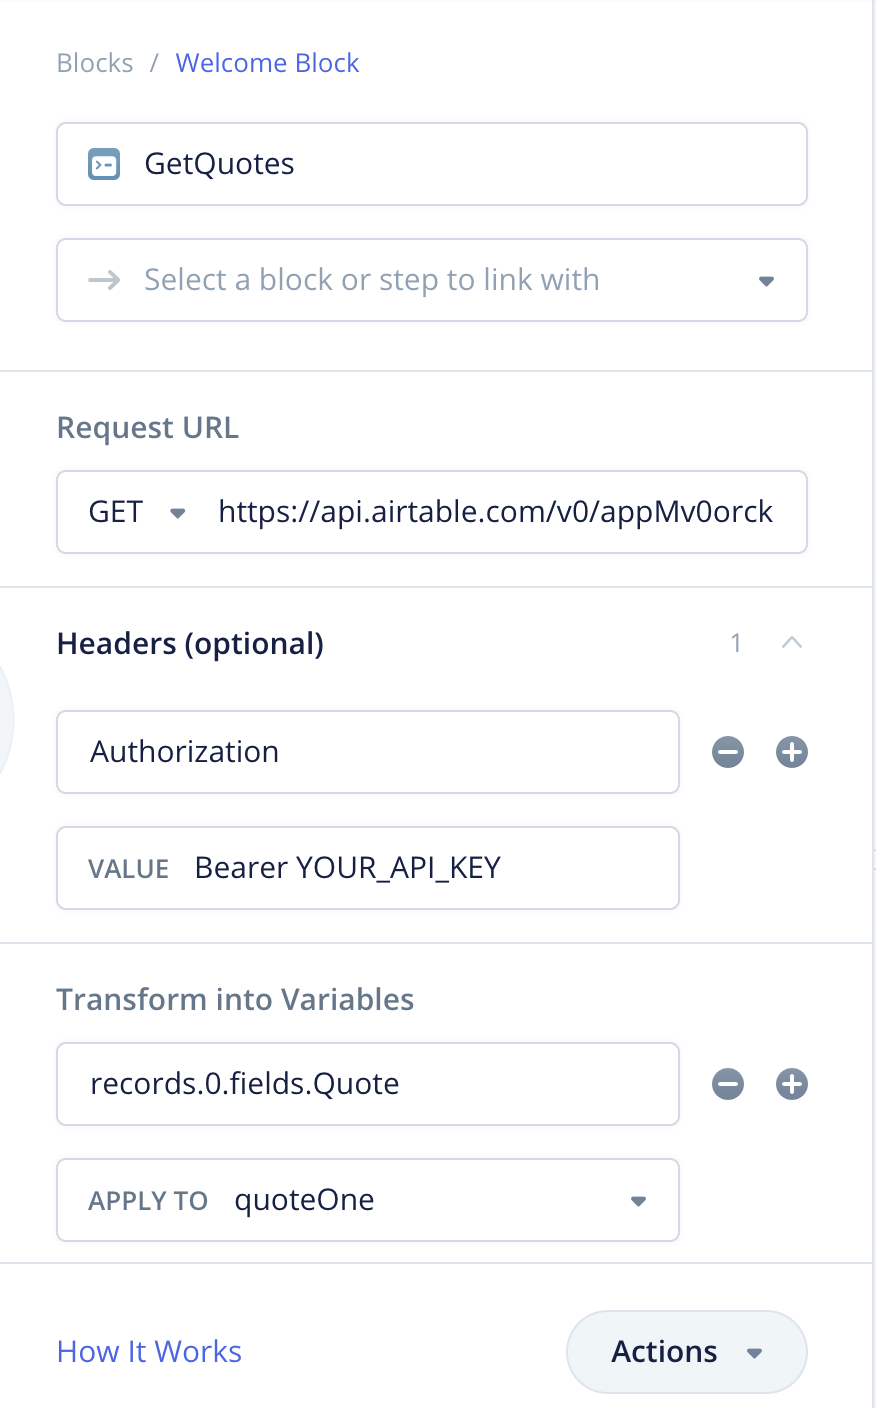
Enter a name for the Integration Step. For our demo, we named it “GetQuotes.”

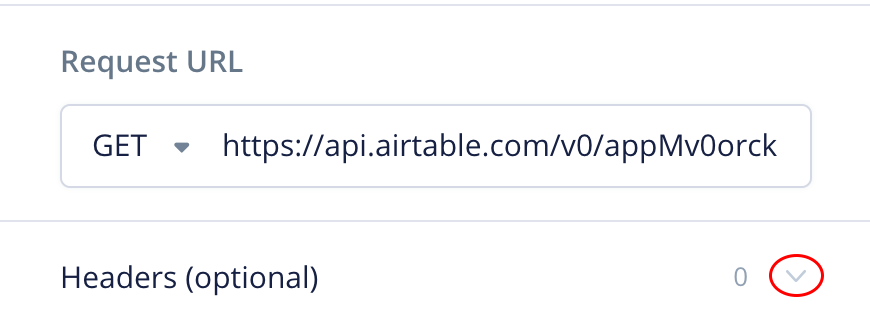
Next we are going to copy and paste the API URL for your Airtable into the following field, where it says “Enter URL supporting {variables}.
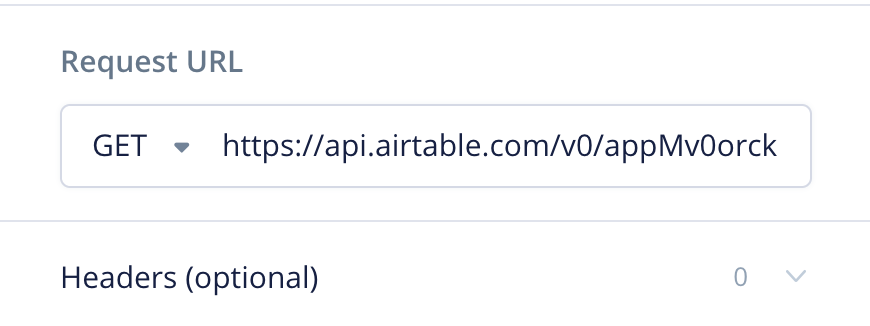
Copy and paste the API URL from the first two rows of your EXAMPLE RESPONSE in your Airtable API documentation. The URL for this tutorial’s demo is:
https://api.airtable.com/v0/appMv0orckRD6BMOa/Quotes?maxRecords=3&view=Grid%20view However yours will be different for your project. Also you will most likely need to adjust the maxRecords parameter from 3 to another number which matches the number of records in the other skills you make.
Airtable requires the use of an authorization key. In the Invocable Integration Step, we will be populating two fields to accomplish this.
Twirl open the down arrow to the right of where it says “Headers (optional).”
Once the header fields are open, you should see two fields.
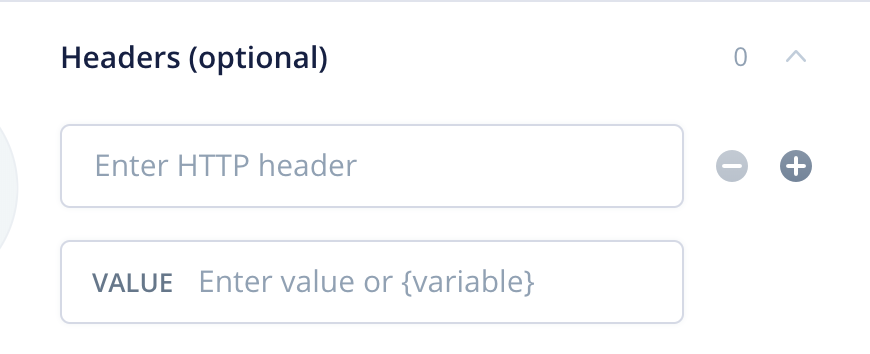
In the first field where it says “Enter HTTP header,” enter “Authorization.”
For the second field named VALUE, we are going to add the URL for the Airtable API. Where the field says “Enter value or {variable}.” copy and paste your API Authorization from the third row of your EXAMPLE RESPONSE in your Airtable API documentation.
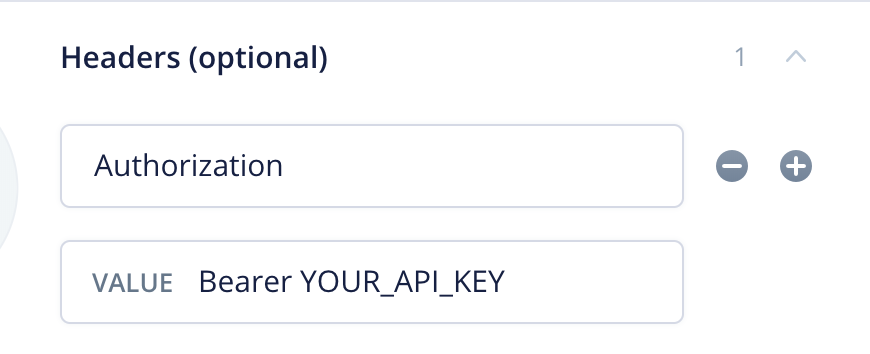
The second field in the Header authorization should be similar to this, except your personal API Key will be substituted for “YOUR_API_KEY”:
Bearer YOUR_API_KEY
The two fields for the “Headers” section of the Integration Step should now look similar to this, except with your actual personal API Key:
Populating the header values is now complete. The next step will be to create variables and populate them with the values coming from the Airtable.
Let’s continue configuring the Integration Step. In this next section we are going to create three API response statements (object path mappings) and assign them to three new variables. When executed, these will retrieve the Quote, Source and Location values from the first row of the Airtable.
For each variable, we will be populating a pair of fields in the next part of the Integration Step.

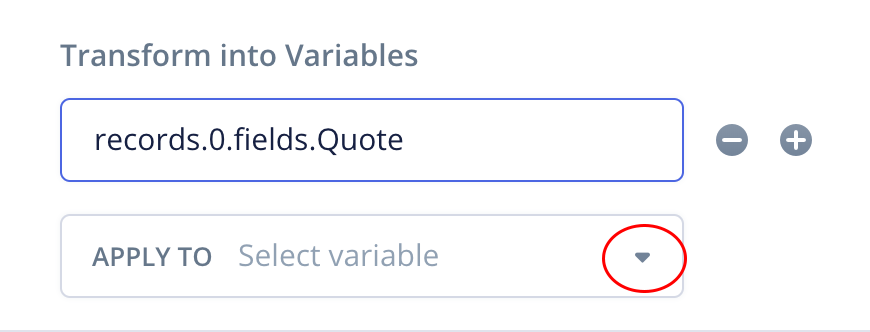
In the first field, where it says “Enter object path,” enter “records.0.fields.Quote.”
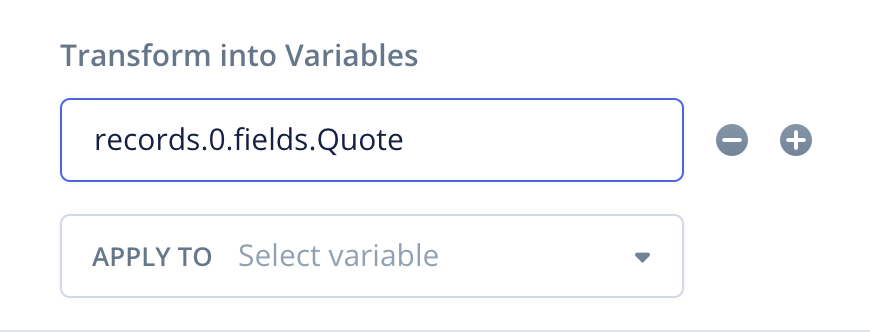
Let’s break down the “records.0.fields.Quote” object path:
- If you recall, there are some key terms we noted when reviewing the API Documentation for our Demo One Airtable.
- These included “records,” “fields”, and the names of the three fields (“Quote,” “Source” and “Location”).
- These values follow the tree-like structure in the EXAMPLE RESPONSE we reviewed in the Airtable API documentation earlier.
- These are used to find the specific values in the Airtable base.
- The numerical “0” programmatically refers to row 1 in the Airtable. Likewise, “1” would refer to row 2, “2” refers to row 3, and so on.
- In other words, “records.0.fields.Quote” is the path that is followed in the tree-like structure to find the value (quote) for the first record.
Now that we have identified the path to the value being returned by the API, we need to add and assign a variable to receive it. This variable will then be used later in the Invocable project.
To proceed, twirl open the little triangle to the right of “APPLY TO Select Variable.”
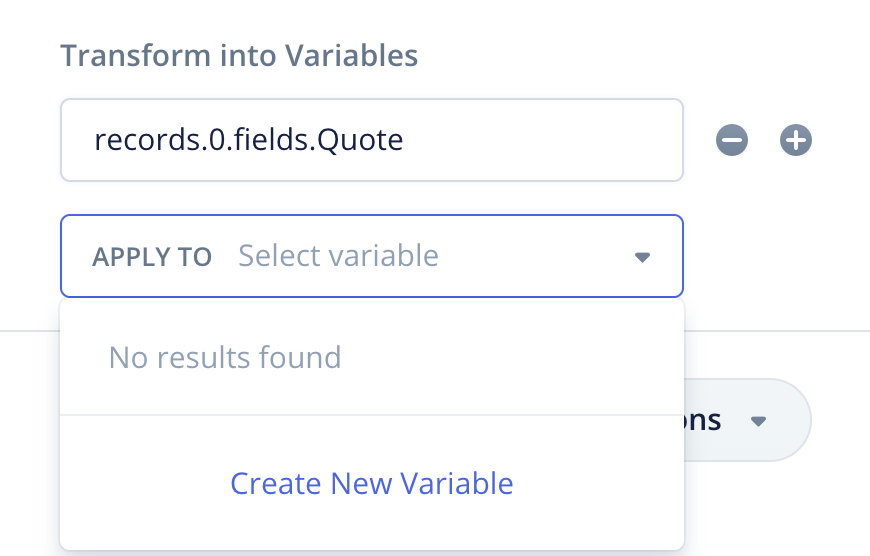
Once opened, you will see “No results found.” This means that there are no existing variables to be assigned. As such, we need to create one. Click on the link “Create New Variable.”
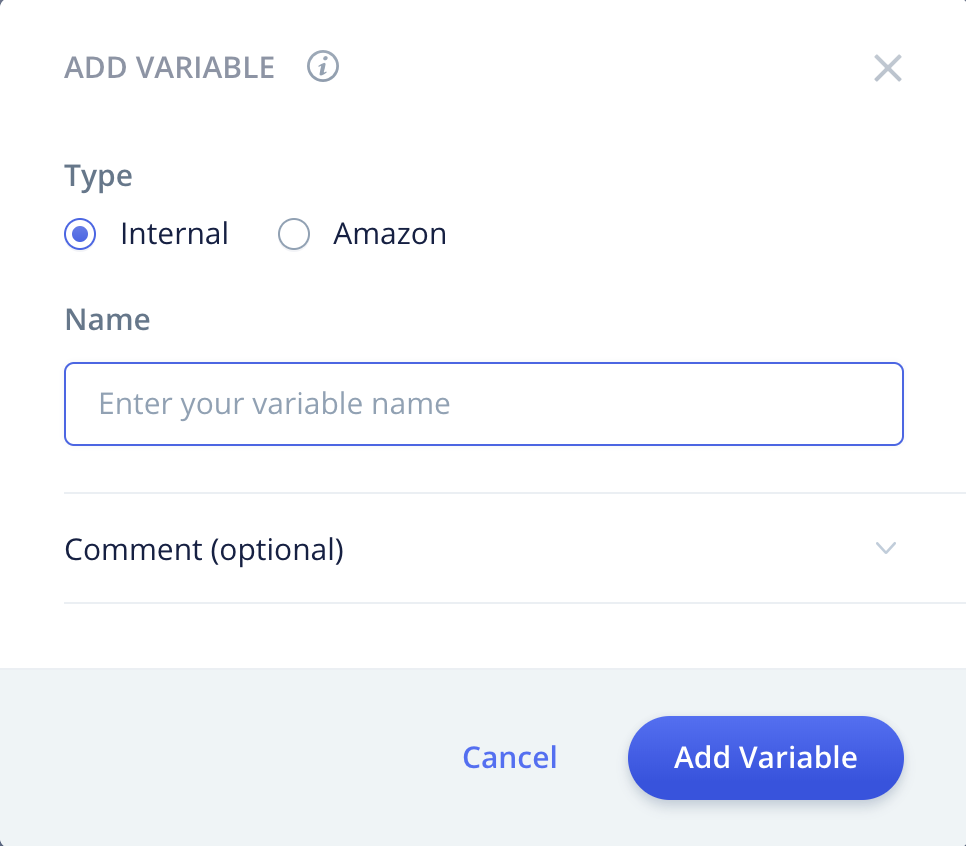
A small window will open, entitled “ADD VARIABLE.” For “Type,” the radio button for “Internal” should be pre-selected. Leave this as is, as we will be adding a new internal variable.
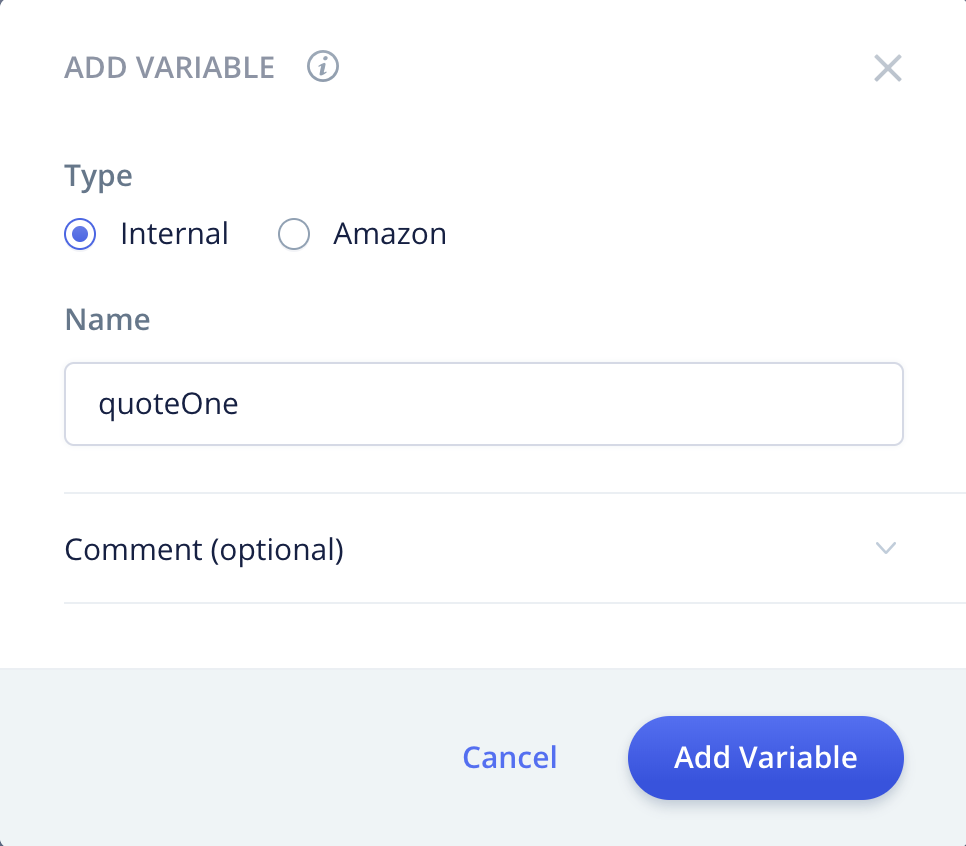
In the Name field (where it says “Enter your variable name,”), enter “quoteOne.” This will be the name of the Invocable variable that will store the quote coming from the first row in the Airtable.
Optionally you can also add a comment to help document what the variable is used for. This is of value when developing larger skills with a substantial number of variables. For this tutorial we will leave the comment field blank.
Once entered, click the “Add Variable” button.
After clicking the “Add Variable” button, the small window will close, and you will see the “APPLY TO” field has been populated with your new internal variable, “quoteOne.”

Congratulations! The first variable assignment is complete. However we have several more to do.
The next step is to create a variable to store the source of the quote in the first row. This value comes from the second field (column) in the first row of our Airtable base.
To proceed, click on the small plus sign (inside the grey circle) to the left the first pair of fields.
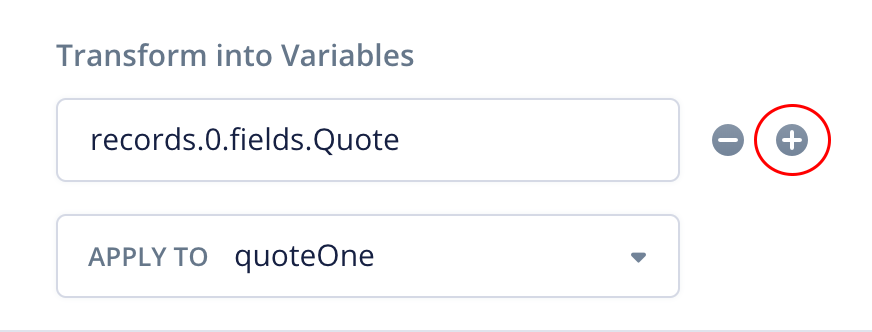
Clicking the plus sign will open up another pair of fields below the first variable assignment. These will be used to store the API mapping of the second variable and the variable name.

To proceed, enter “records.0.fields.Source” in the first field where it says “Enter object path.” Follow the same steps to complete the variable and assignment as we did for the first one.
- Twirl open the second field.
- Click “Create a New Variable.”
- Add sourceOne as a new, internal variable.
- Click “Add Variable.”
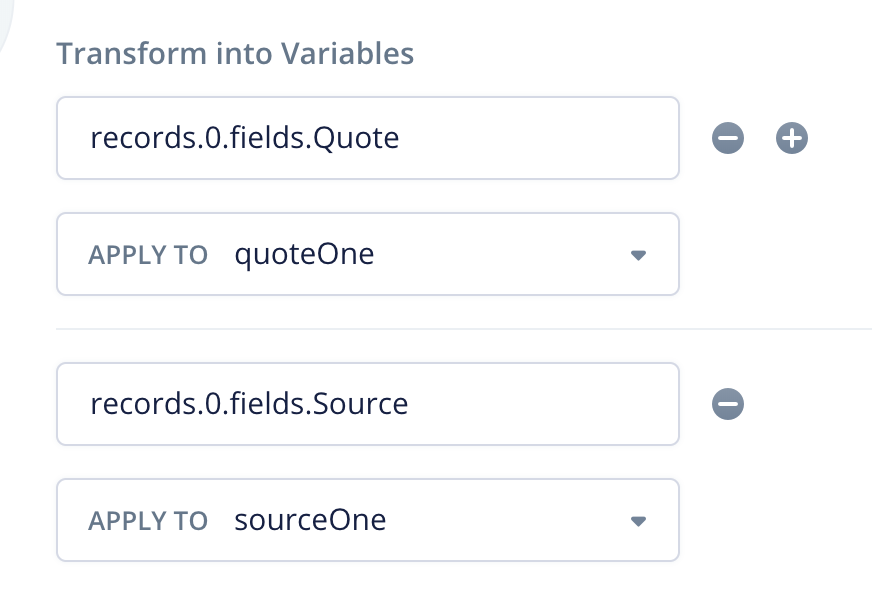
After completing these steps, the fields for the second variable should look similar to this image.
Add a third variable to store the “Location” value using the same procedure. The mapping is “records.0.fields.Location”, and the variable name to use is “locationOne.”

At this point, we have three variable assignments. quoteOne, sourceOne and locationOne are the three internal Invocable variables to which we have assigned the returned values for the first row in the Airtable.
Here are several design considerations with the Integration Step:
If we want this particular Integration Step to retrieve just the first row, we could consider this step to be complete. However it is also possible to retrieve multiple values from the other rows as well in a single Integration Step.
How you design the Integration Steps for your projects will depend on your Alexa skill design and flow. For example, you can retrieve all of your values in one big step. Or you could have small Integration Steps scattered throughout your Invocable project, retrieving only what is needed “just in time,” and depending on what paths are followed based on user responses.
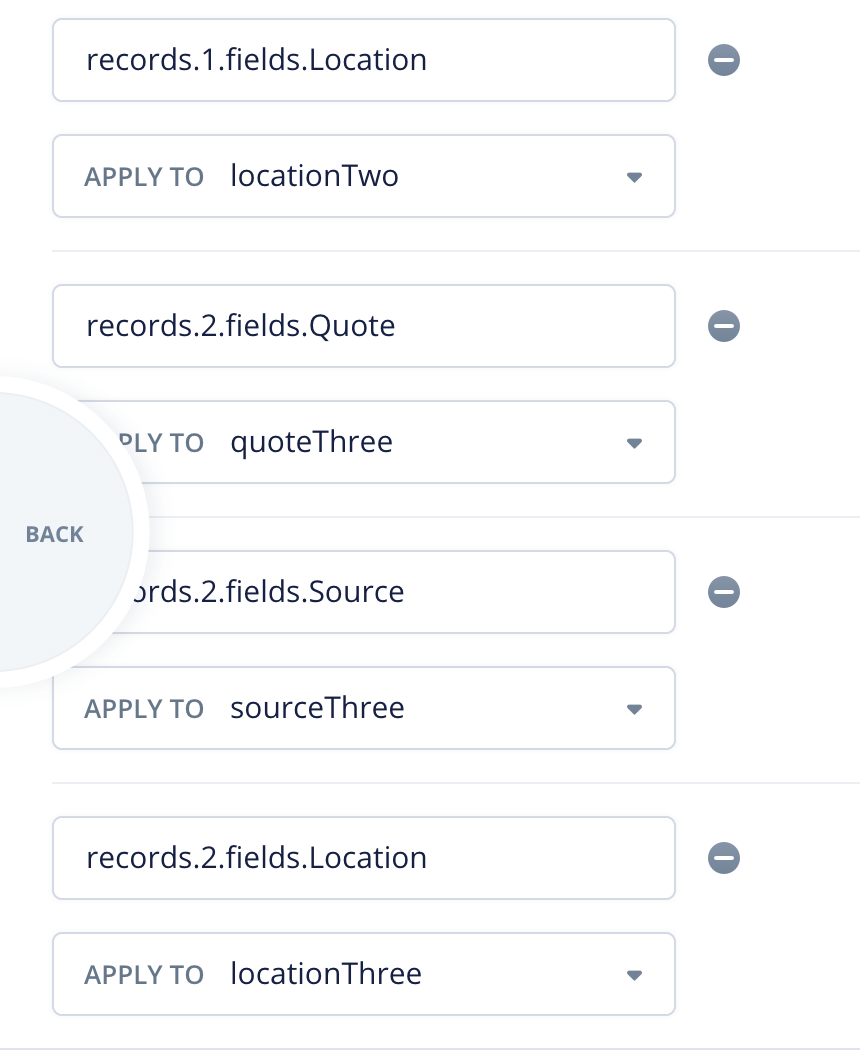
For this test demo, let’s retrieve all three field values for all three rows. Please repeat the steps and add an additional six variables and API Response mappings and assign them to the variables as shown below. You can copy and paste from the following text:
records.1.fields.Quote
quoteTwo

records.1.fields.Source
sourceTwo

records.1.fields.Location
locationTwo

records.2.fields.Quote
quoteThree

records.2.fields.Source
sourceThree

records.2.fields.Location
locationThree
PRO TIP: If your skill has a substantial number of variables, they can also be added via the Variables tab on the project canvas, and then more easily selected when configuring the Integration step. This is an alternative to adding variables “on the fly” as shown in this tutorial.
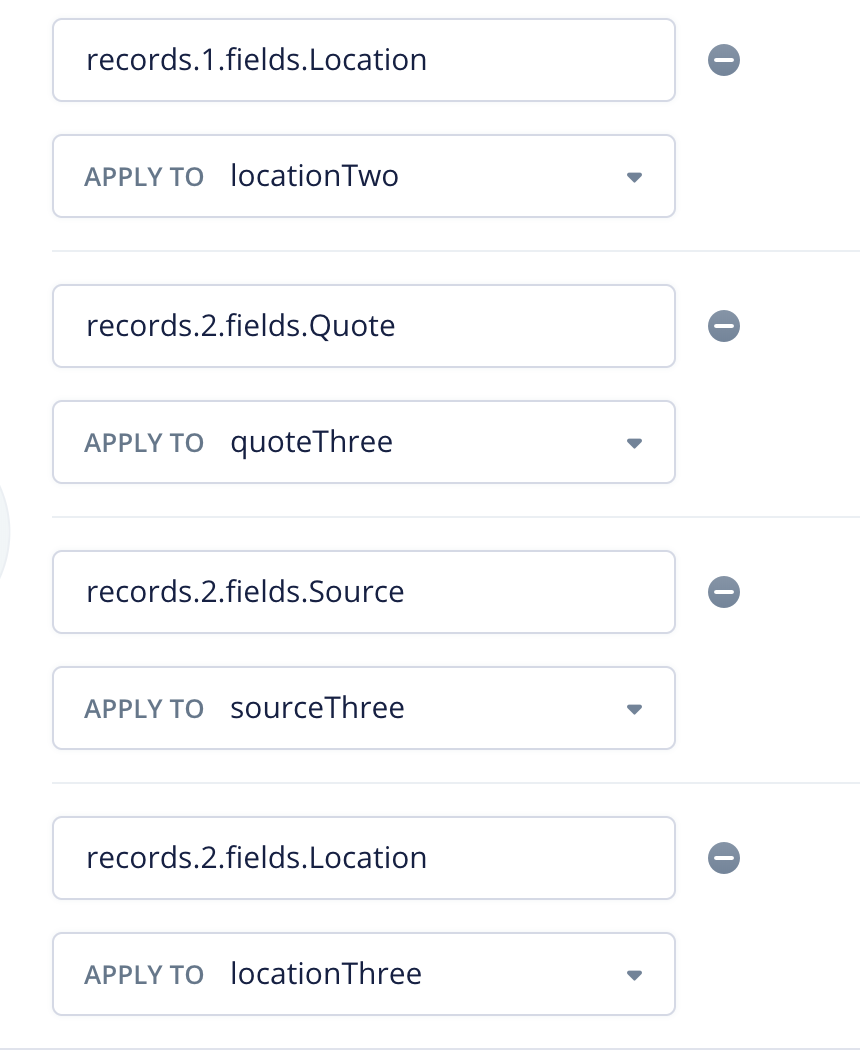
Once the additional variables and mappings are added, the Integration step should look similar to this (with the window scrolled to the bottom):
If you scroll up, and twirl open the header fields, the Integration step should look similar to the image below. There should be a total of nine new variables and assignments (a quote, source and location for each row, times three rows).
Congratulations! The Integration step is now complete!
To close the Integration step, look closely at the left edge of the step, and you should see grey, partial semicircle.
If you hover your mouse over it, the semicircle should expand and display the text “BACK.” Click on this grey semicircle to easily close the step.
The completed Welcome Block should now look like this:

Next, let’s add an “Alexa Step.” These are the steps we use to identify what Alexa recites to the user. The text we add will include the variables we defined above. More specifically, this first Alexa Step will include the first three variables from the first record in the Airtable (quoteOne, sourceOne and locationOne).
To proceed, click on the small Alexa button with the speaker icon in the lower left corner of the Welcome Block.

An empty Alexa Step will open.
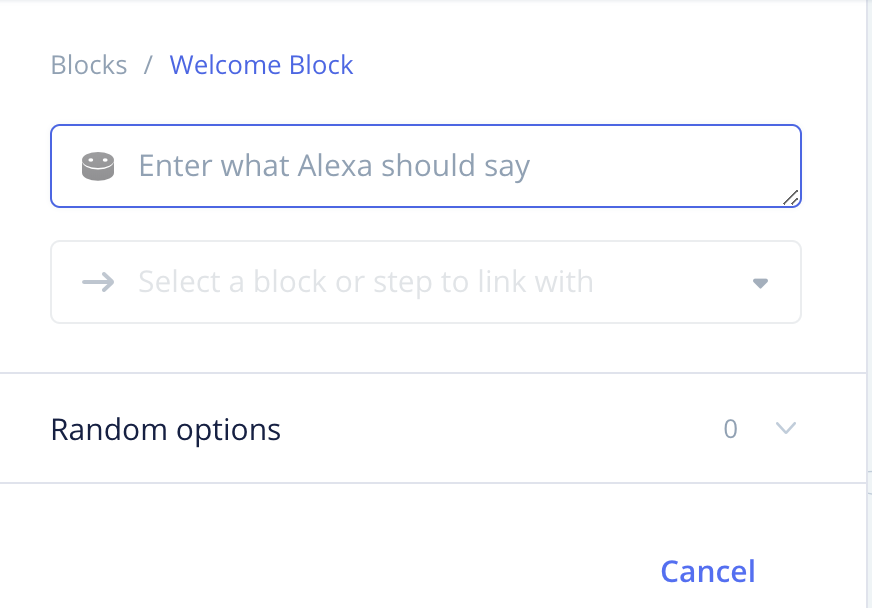
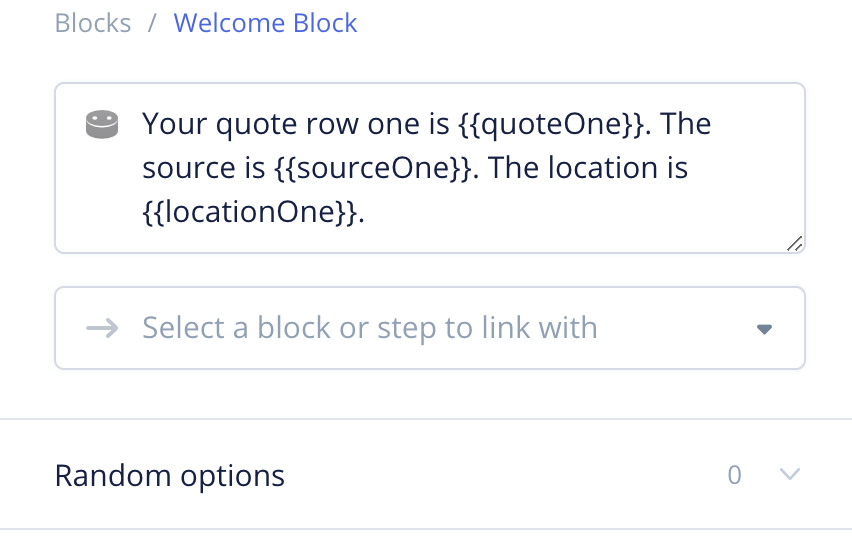
In the field where it says “Enter what Alexa should say,” enter the text as shown in the image below, including the variable names with double curly braces. When the Alexa skill runs, Alexa will recite this text, along with the values from the first row in the Airtable base.
Once the text is entered, hover over the grey semicircle as before, and click “BACK to close the Alexa Step.
The Welcome Block should now look like this:
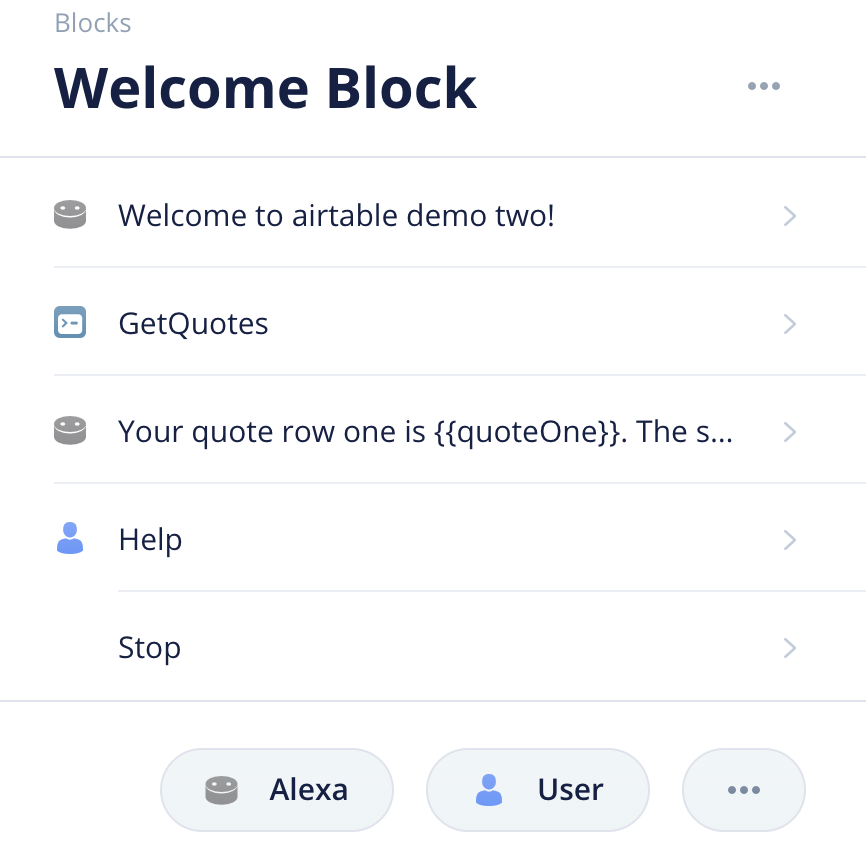
Programmatically, the Alexa skill will flow from the initial welcome, perform the Integration Step, and then recite the text for row 1.
NOTE: If the steps are out of order, you can drag them around and rearrange them within the Welcome Block.
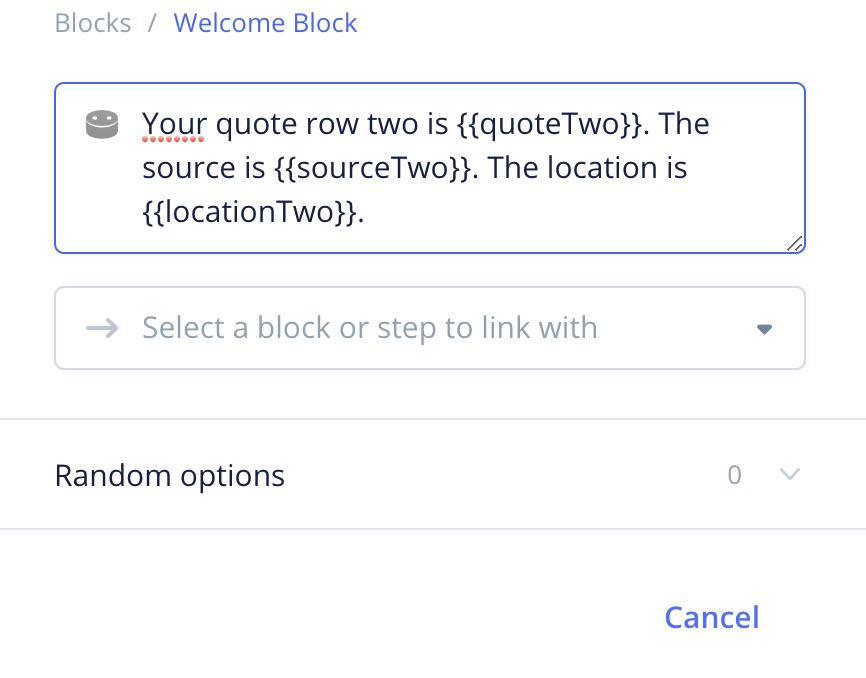
Please proceed and add a second Alexa Step for the second Airtable row of quote values.
Likewise, please proceed and add a third Alexa Step for the third Airtable row of quote values.
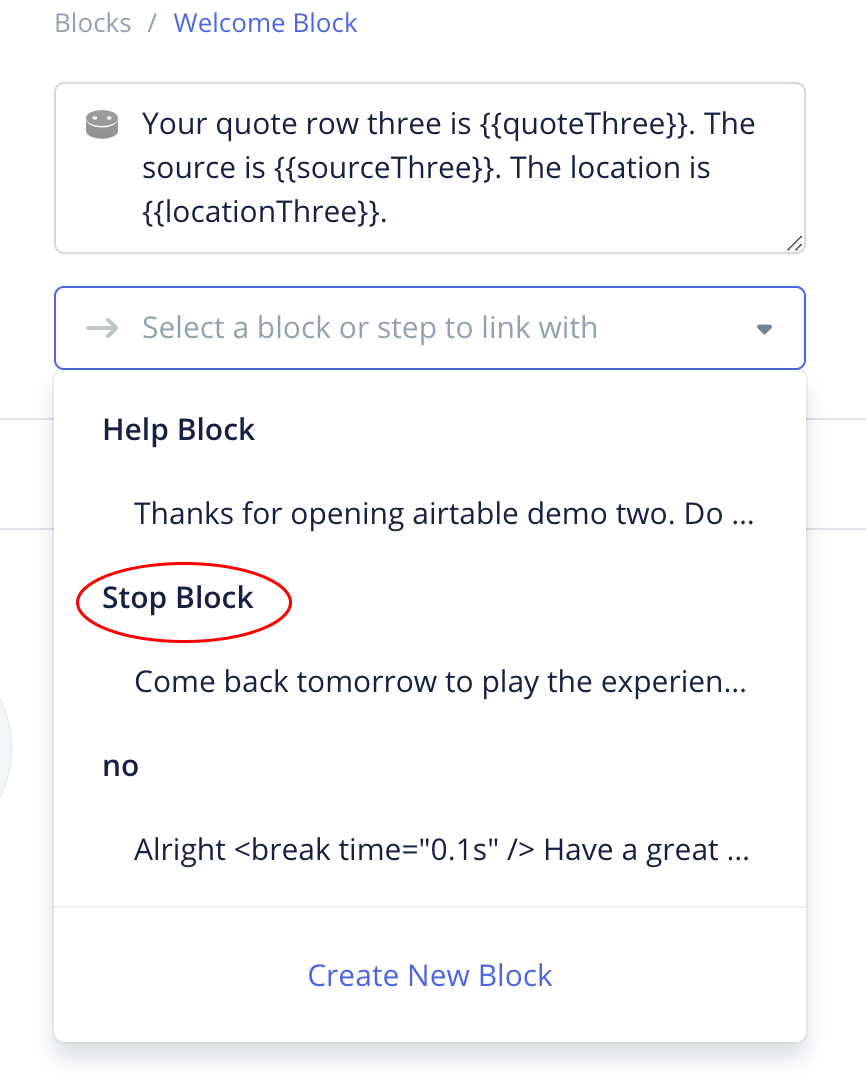
However, this time do not close the step. Instead, click on the small triangle and twirl open the field where it says “Select a block or step to link with.”

A selection drop-down will open. For this tutorial skill, let’s simply connect the third Alexa Step to the Stop block.
For the user, what will happen is that after Alexa reads the text in the third Alexa Step, the skill will proceed to the Stop Block and perform actions related to finishing the session.
To proceed, click on the “Stop Block” option.
After selecting “Stop Block,” the step will automatically close the drop-down, and the third Alexa Step will display the connection.

Close the Alexa Step using the “BACK” button (remember, this is the small grey semicircle you hover your mouse over along the left edge of the step). Upon closing, the Welcome Block should now look like this.

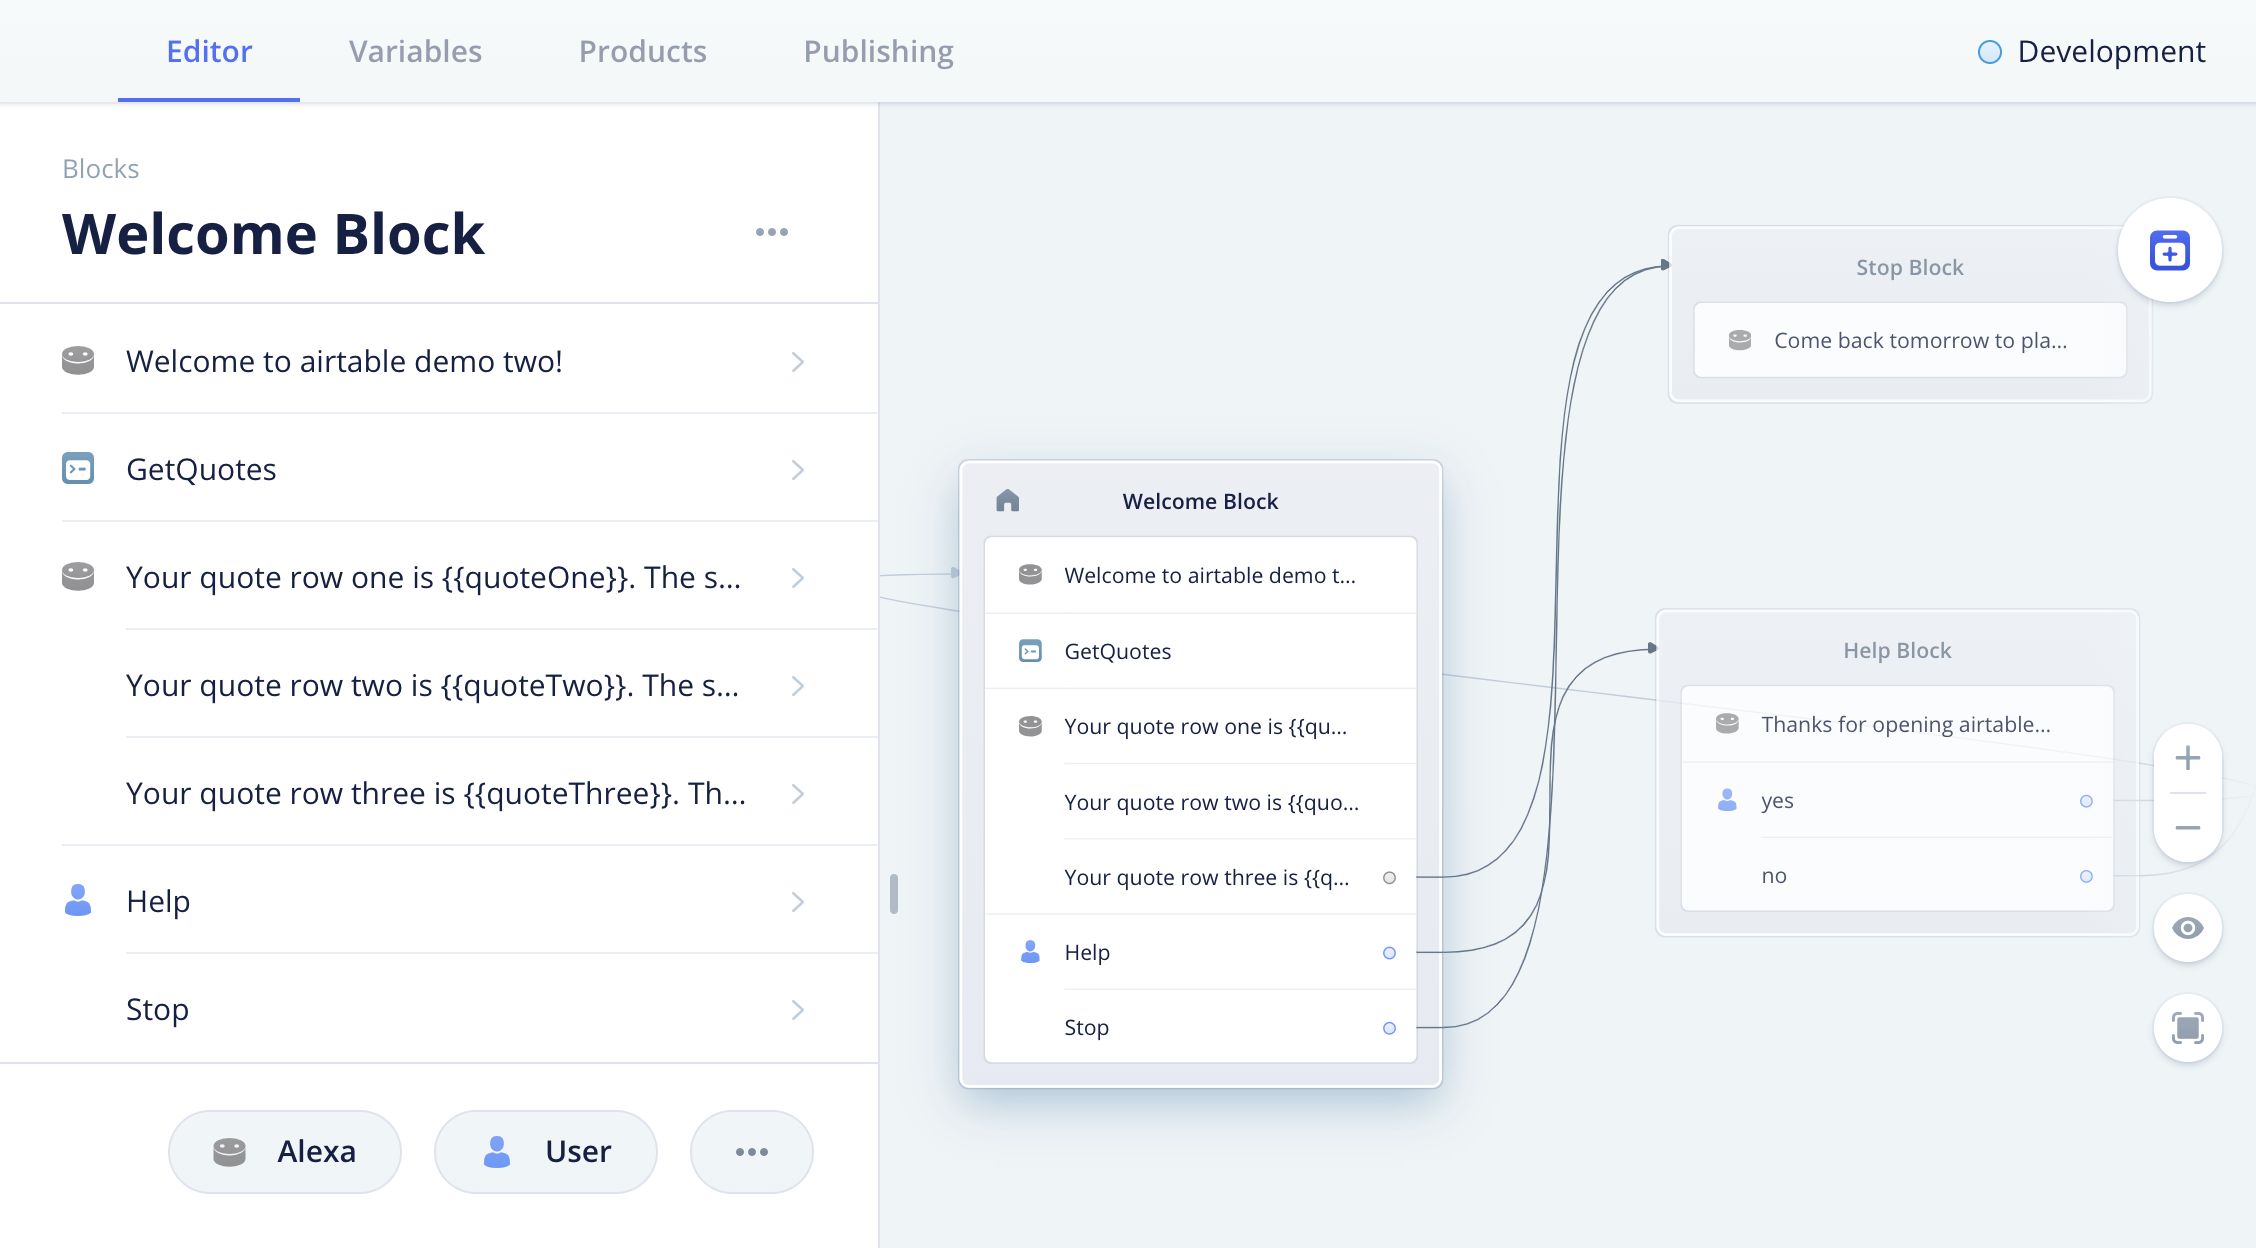
If you look at the project canvas, you can see the connector from the third Alexa Step in the Welcome Block going to the top of the Stop Block.
Click somewhere on the canvas outside the Welcome Block to close it.
It is possible your “Blocks” panel may be open after closing the Welcome Block. This panel provides easy access to all your blocks, which is convenient for large projects. To close it, click on the small vertical dash along the right side of the block (red semicircle).
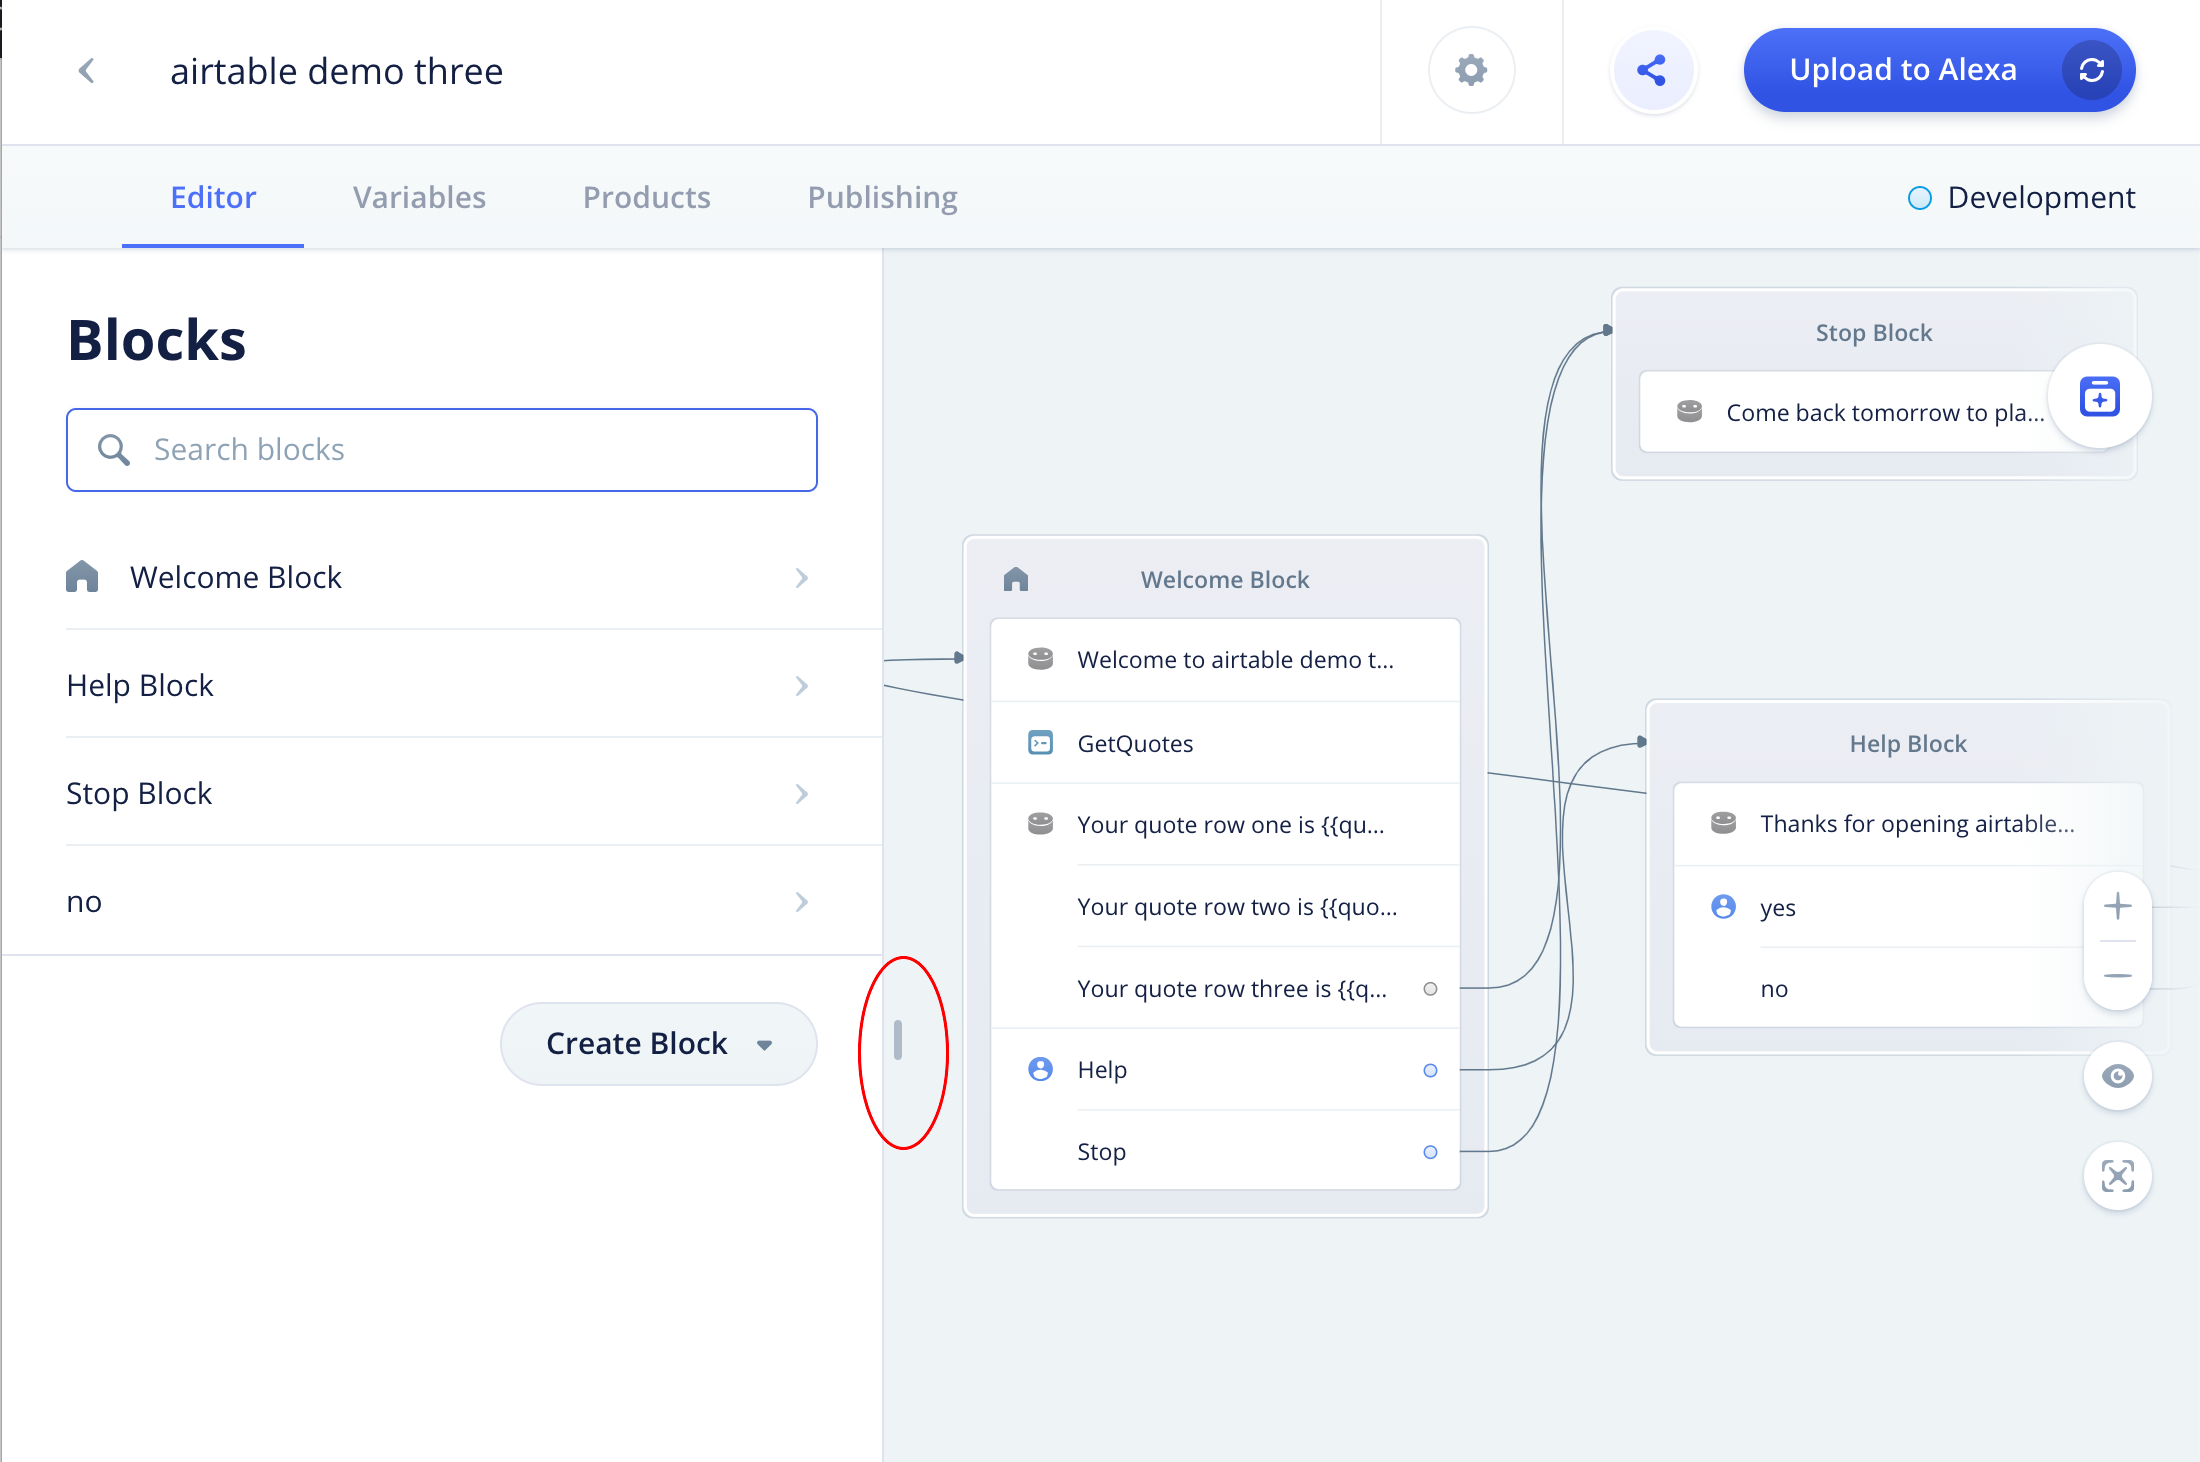
Although it may vary in size and position, your project canvas should look similar to this:
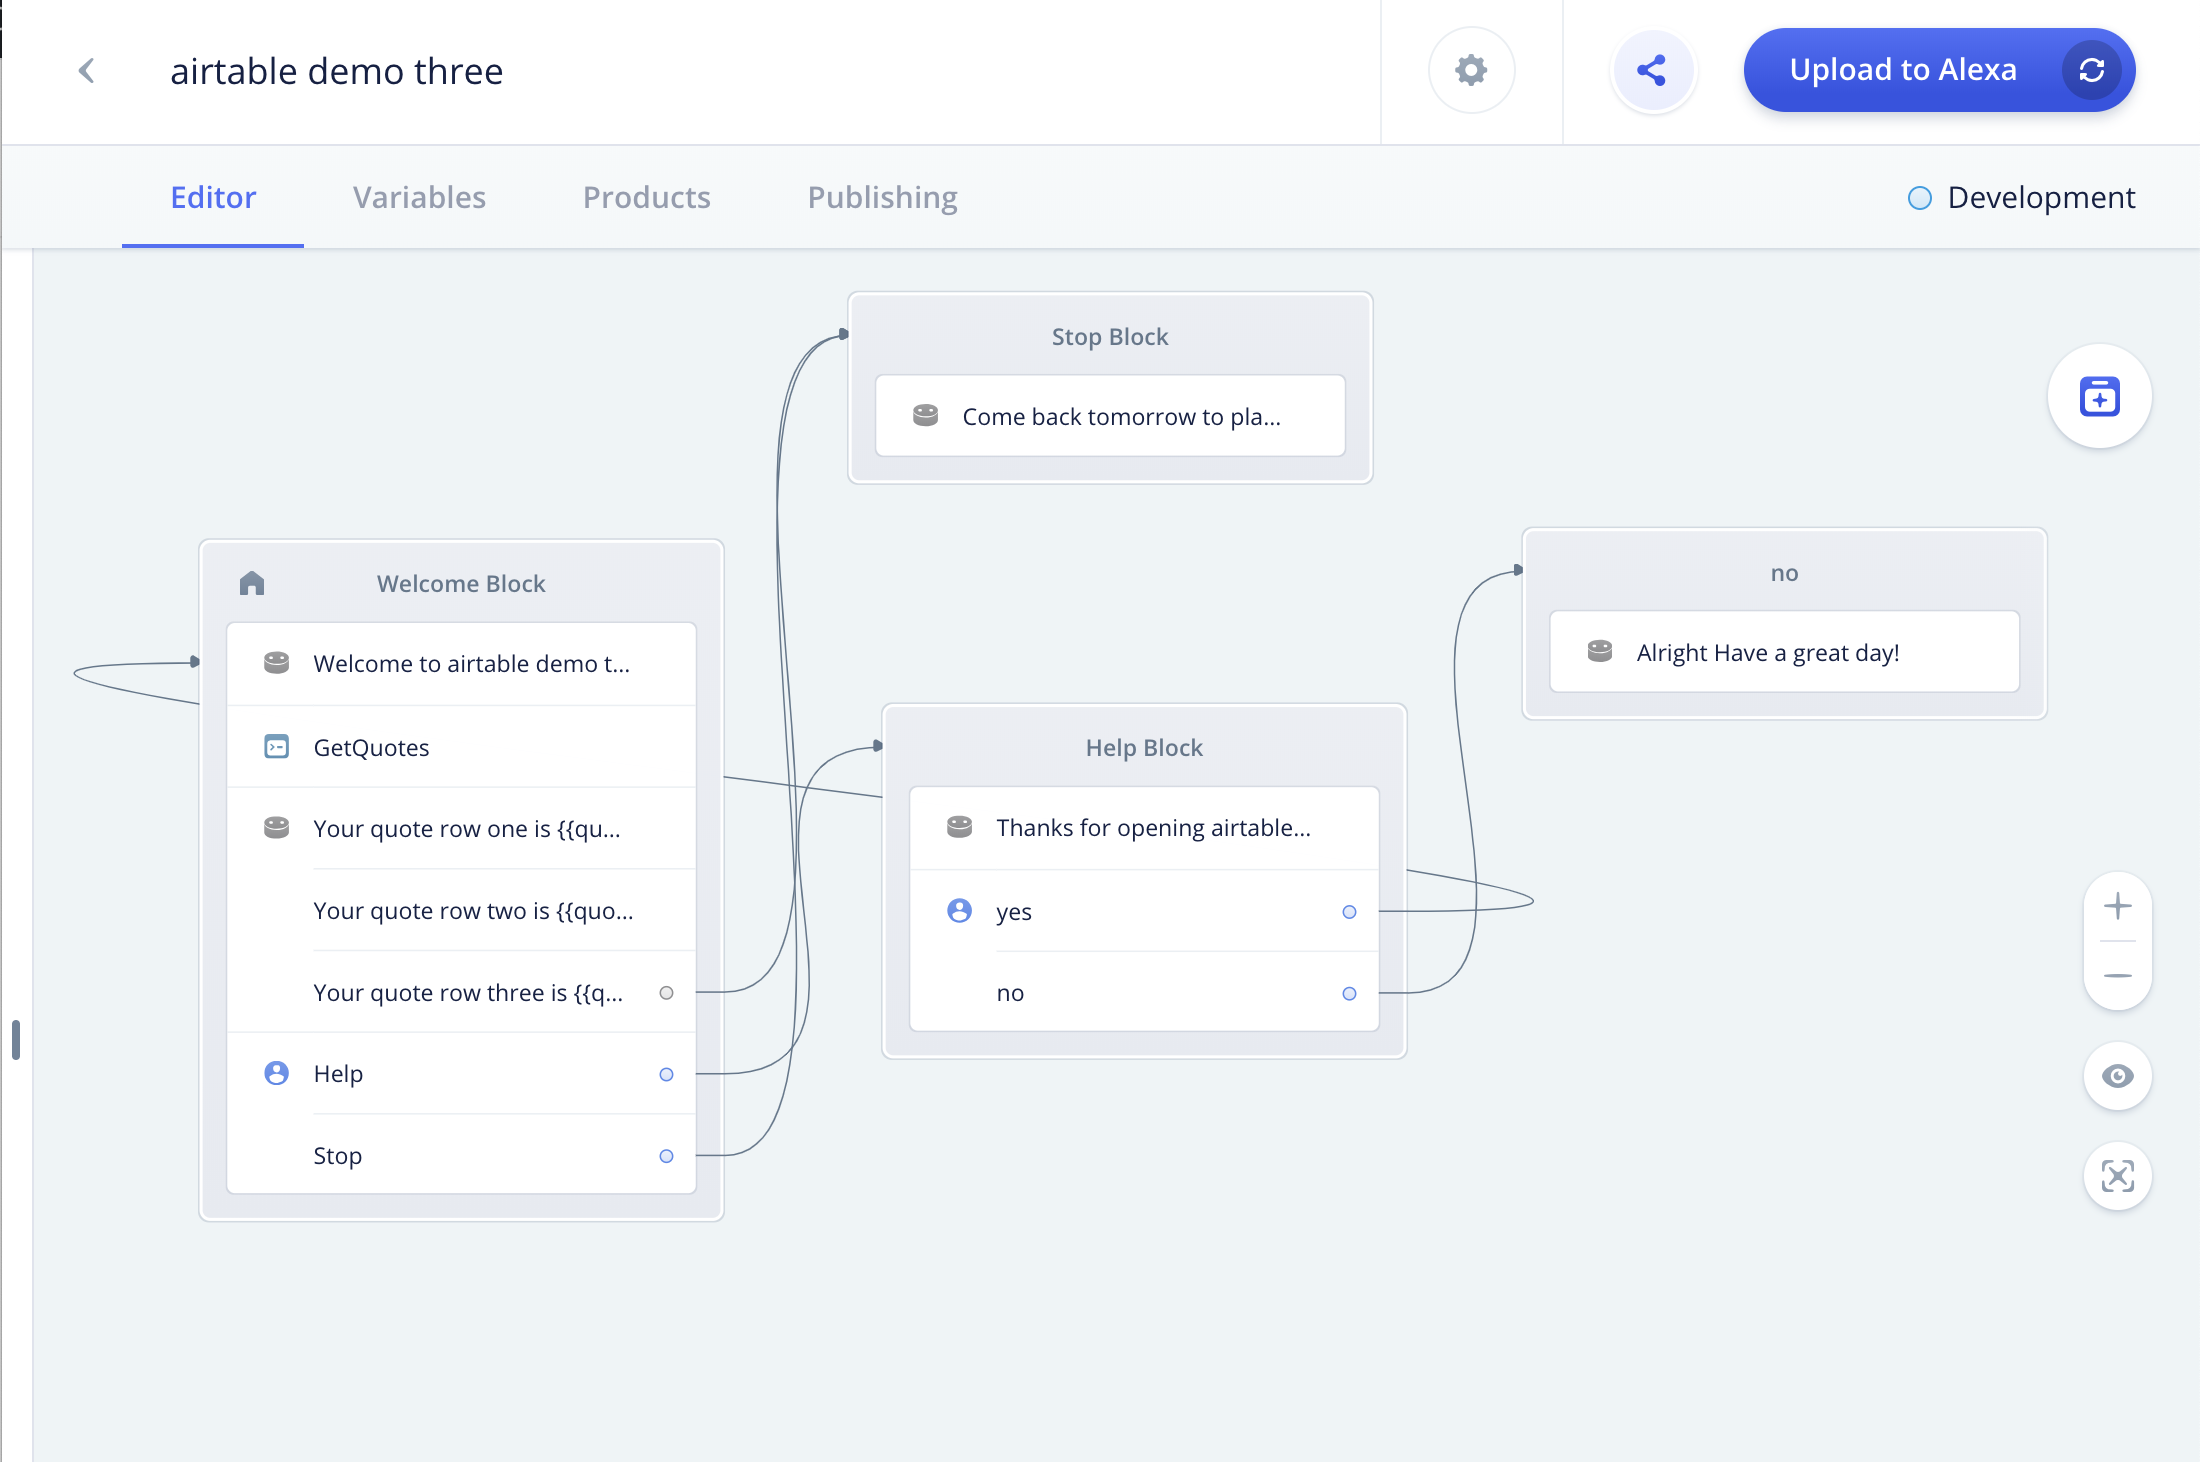
Congratulations, the skill configuration is now complete! Your Invocable project has the bare minimum for “uploading to Alexa” for testing with the Airtable “Quotes” base.
To upload your test project to the Amazon Developer Console for testing, click on the blue “Upload to Alexa” button located in the upper right corner of the project canvas.

Allow a minute or two for your test skill to upload and build on the Amazon server. You may notice the spinning blue icon.

Once the upload is complete, a small check mark inside green circles will display.

Congratulations! At this point, you have uploaded your Invocable test project to the Amazon Developer console and is is available for testing.

PART 5 – Test using the Amazon Test Simulator
There are multiple ways of testing your Invocable test project.
- Use an Alexa-enabled smartspeaker such as an Echo device.
- Use an Alexa App on a smartphone.
- Use a service such as Echosim.io.
- Use the Test Simulator in the Amazon Developer Console.
These are all excellent options for testing, and when building your projects, you will most likely use a combination of these for ongoing testing. For this demo, we are going to test the project using the Test Simulator located in the Amazon Developer Console.
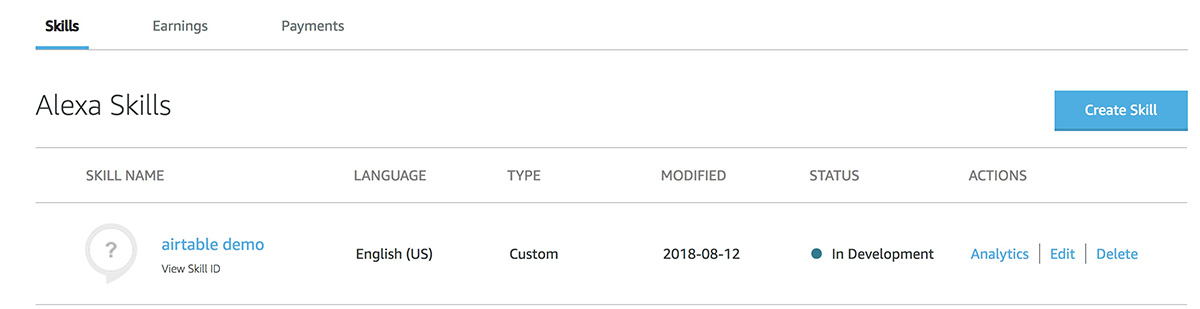
Log into your Amazon Developer account, and navigate to your Alexa Skills Console. Here, you should find your test project. Select the project by clicking on either the skill name or the “Edit” link.
Upon opening the skill, you will be in the “Build” section by default. Click on the “Test” tab to proceed to the Test Simulator.

Below is the Test Simulator. As an option, you can change the Language and Region from English (US) to a different one, if desired.
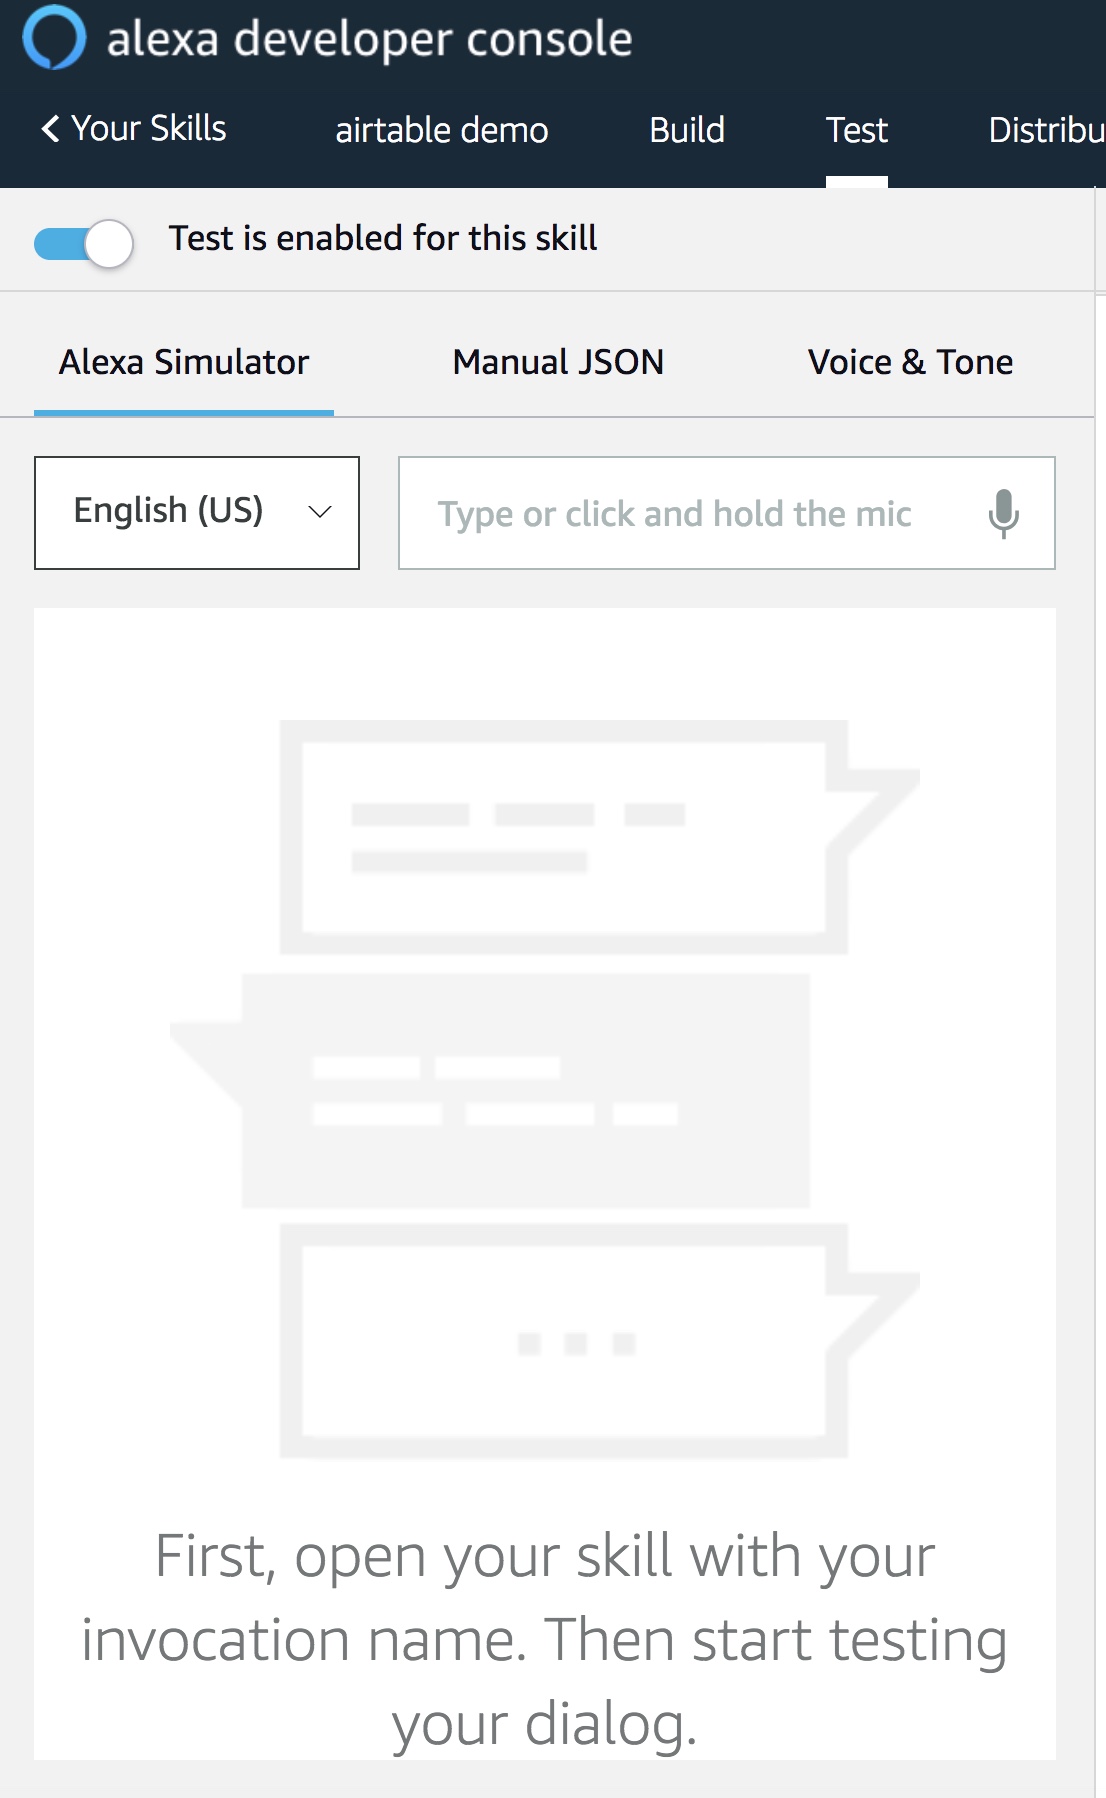
There are two ways to test.
- Click on and hold down the small microphone icon, and then say the invocation name of the demo skill. The test should run upon releasing the microphone.
- Type in the invocation name in the field. The test should run upon clicking the return/enter key.
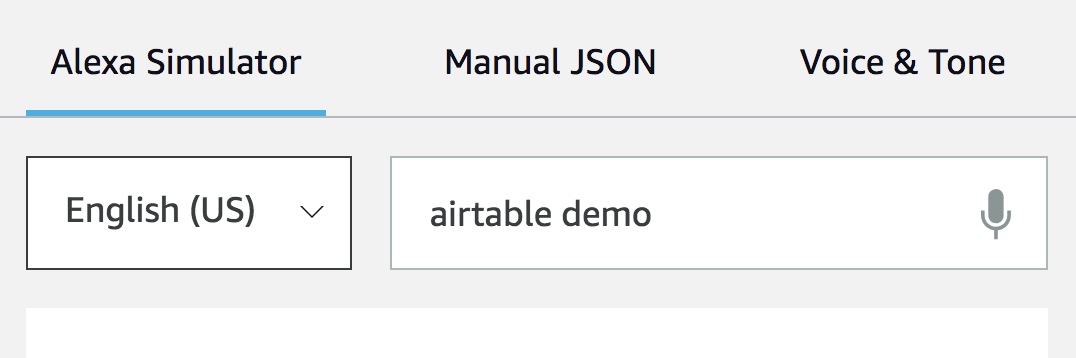
For our test, type in the invocation name, which is “airtable demo”, and then press your return key.
The test simulator will have Alexa do several things.
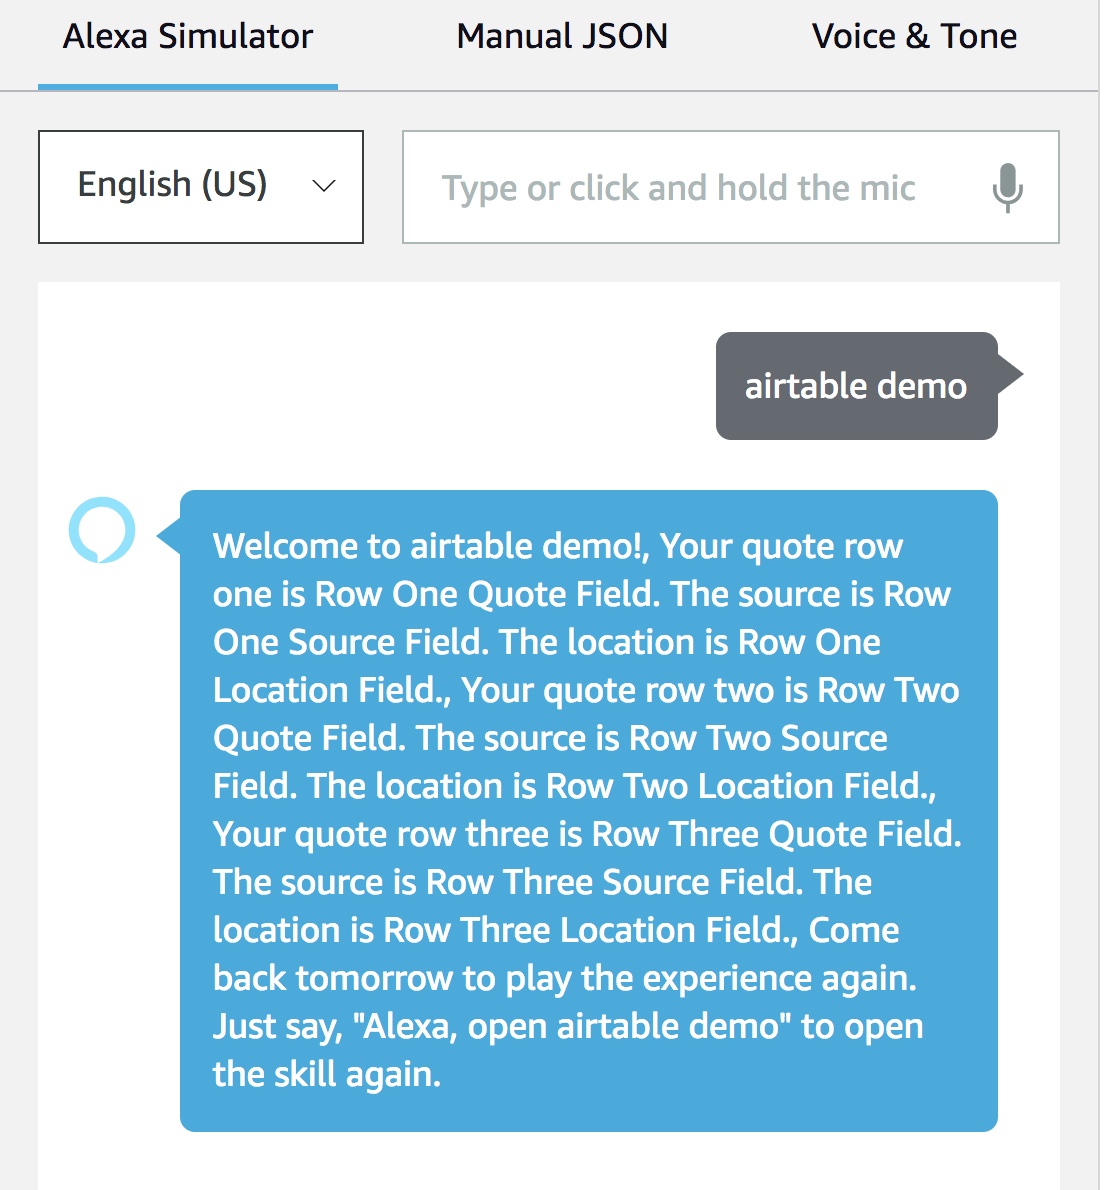
- Alexa will recite the three quotes and associated values as expected from the skill. As you listen to what Alexa says, you can compare to your expected replies based on the design.
- Text for her response will be displayed in the test simulator window (see the example below). When you review the text, you can verify that each of the quotes were correctly recited.
- Additional information regarding the inputs and outputs are displayed in the right part of the screen (not shown). This output may be of value for troubleshooting issues should they occur.
To complete the test, you can verify the displayed results against your test data in your Invocable project and the Airtable base.
If your output matches what is shown above (and assuming you followed the demo precisely), congratulations, the test has been successful!
At this point you can try different tests. For example, repeat the test using the microphone and invoking the skill verbally.
Another thing to try is to edit some of the field values directly in the Airtable base, and re-test. For example, type in a quote such as “To be or not to be” in one of the fields, and then immediately re-test. Notice the updated value is immediately available for Alexa to recite.
Conclusion
During this tutorial we did the following:
- Created an Airtable base.
- Added test records to the base consisting of multiple rows and fields.
- Determined the API URL and API Key for accessing the records.
- Created Invocable test project and integrated it using an Integration Step. We also added three Alexa Steps and connected the third step to the Stop Block..
- Ran a test, and confirmed that Alexa can retrieve values from multiple rows and fields in an Airtable base and recite them.
Airtable provides some nice opportunities as a data source for Invocable prototyping projects and Alexa skills. It is relatively easy to use by non-programmers, and is ideal for team collaboration.
Thank you for reading!
Header Photo by Christina Morillo from Pexels