

Updates
Updated March 14, 2020 to reflect the Voiceflow February 4th, 2020 new releases.
Introduction
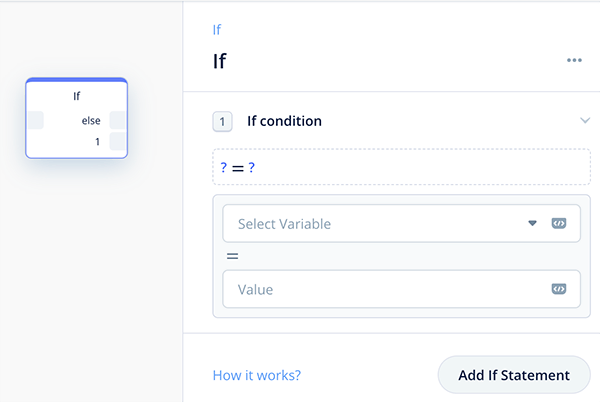
VoiceFlow is a powerful skill-building tool, incorporating a variety of features including IF blocks for configuring IF statements.
Compound IF statements can be built using AND, OR and NOT. For example:
(score > 10) AND (lives < 3)The structure of the above formula is common. Having the parentheses in the right places is an important aspect of these types of statements.
There are several ways to configure compound IF statements. One way is to use the “Expression” feature, and write out the statements, but this can be daunting for non-programmers.
Another way is to leverage the block’s formula-building features, which relies primarily on clicking, variable selection and adding your values. This tutorial shows this second method.
Our Objective
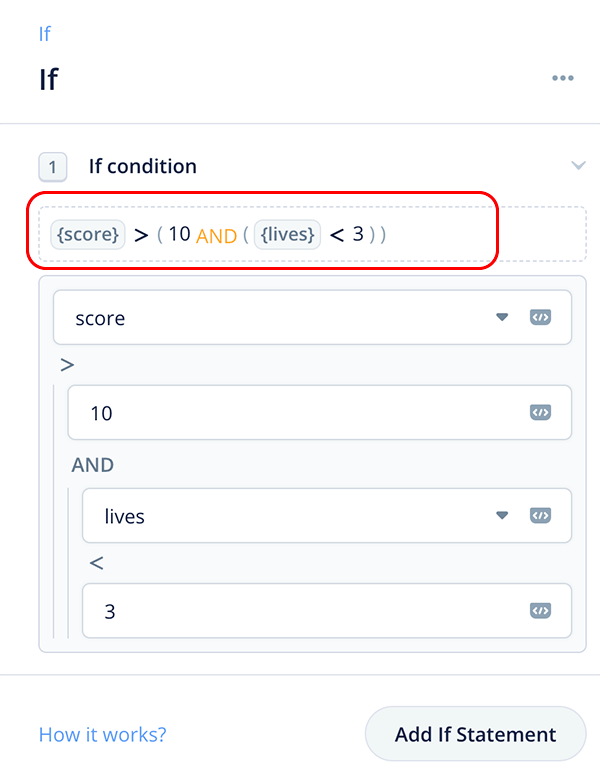
For our tutorial, our objective is to learn the basics by configuring the following compound statement:
(score > 10) AND (lives < 3)If you try and build this statement in a linear, top-down fashion, you might end up with something like the image below. Notice the parentheses do not quite match our desired outcome.
This tutorial shows a technique which will result that looks like the image below. Notice the parentheses in the formula in the upper part of the IF block now matches our desired outcome.
Desired Outcome: (score > 10) AND (lives < 3)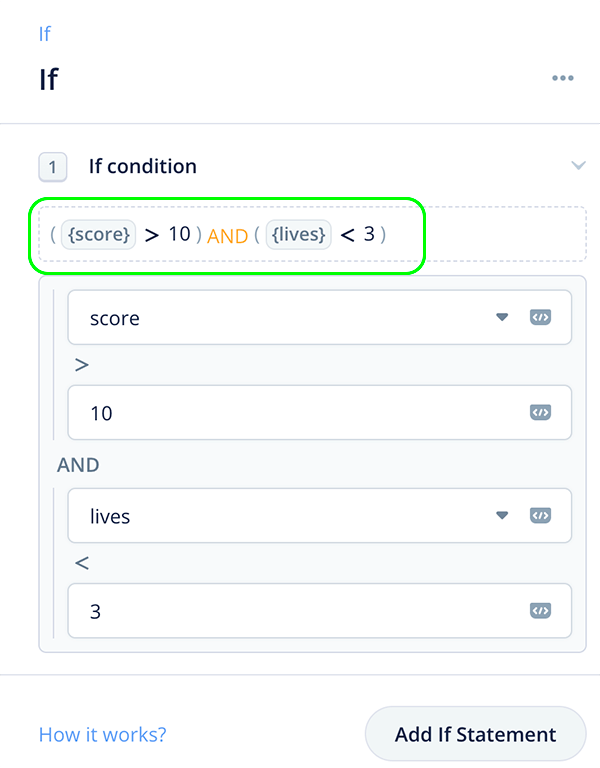
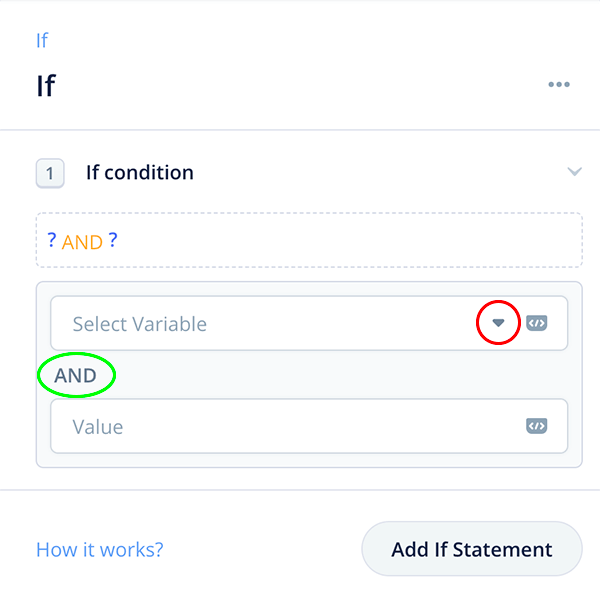
The secret sauce for configuring compound IF statements in a Voiceflow IF block:
- Configure the AND, OR or NOT first.
- Configure the all of the left operands second.
- Configure all of the the operators and right operands third.
Ok, let’s dive into the pool head-first…
Steps
Click on the =. This will open the operator drop-down. Next select the AND.

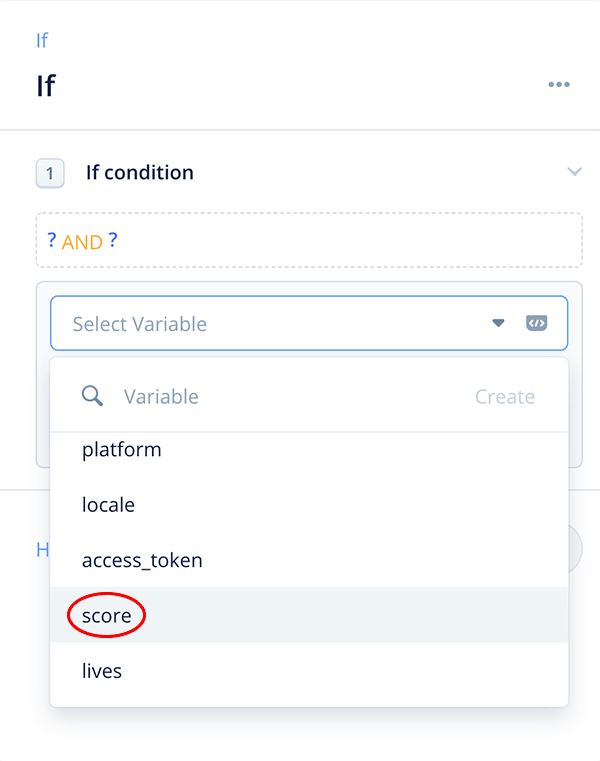
Notice the AND in between the two condition fields. Next, twirl open the drop-down (i.e. the little triangle) for the first condition. We will be selecting the first variable.
For the first condition, in the drop-down, find your variable and select it.
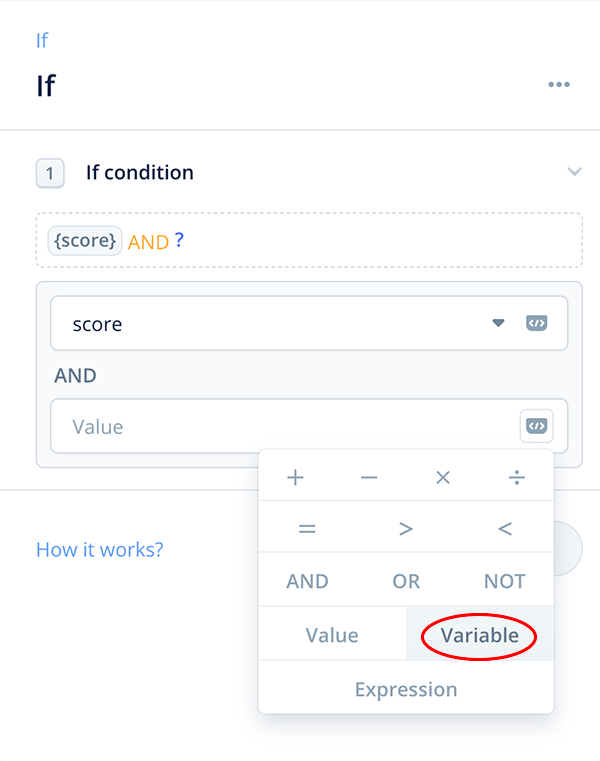
Notice how your variable has been brought in as part of the first condition. Next, click on the operator icon for the second condition. This is the little </> symbol.

Select “Variable” for the operand type for the second condition.
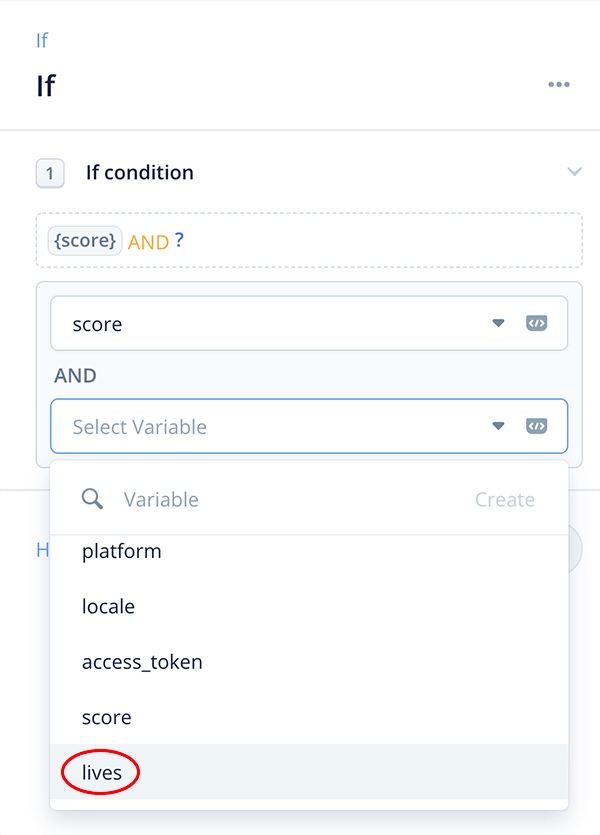
Notice that the operand type for the left-hand side of the second condition is changed, and now says “Select Variable.” Twirl open the drop-down for the second condition.

For the second condition, in the drop-down, find your second variable and select it.
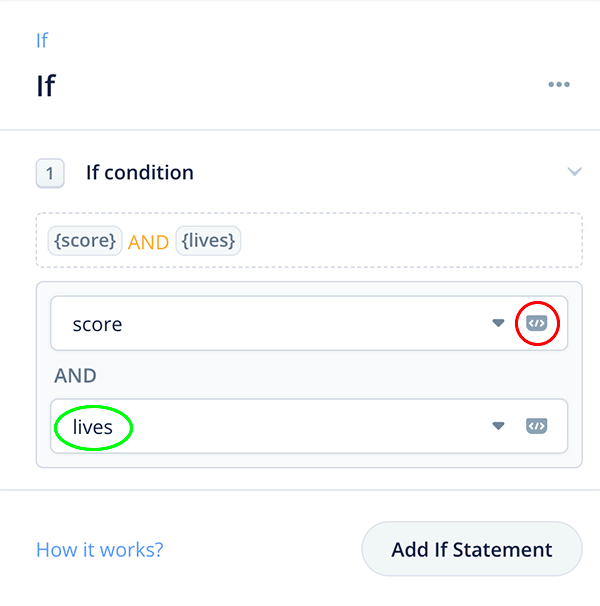
Notice how your variable has been brought in as part of the second condition.
Also notice how the formula in the Expression bar is shaping up so far. We are ready to configure the comparison operators and the right operand values.
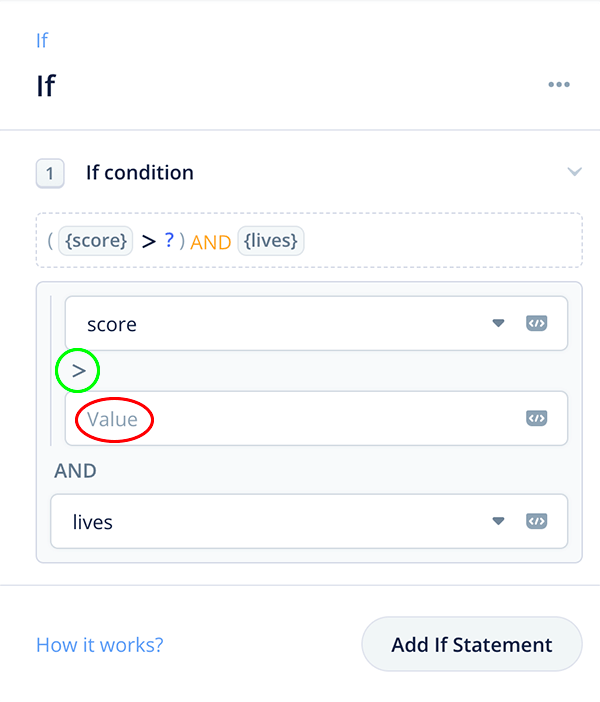
Click on the operator icon for the first condition. This is the little </> symbol.
Select your comparison operator for your first condition. In this tutorial we are selecting the “>” symbol.

Notice how the “>” has been added to the screen. Next, in the “value” field, enter a numerical value. Note that this can also be another variable.
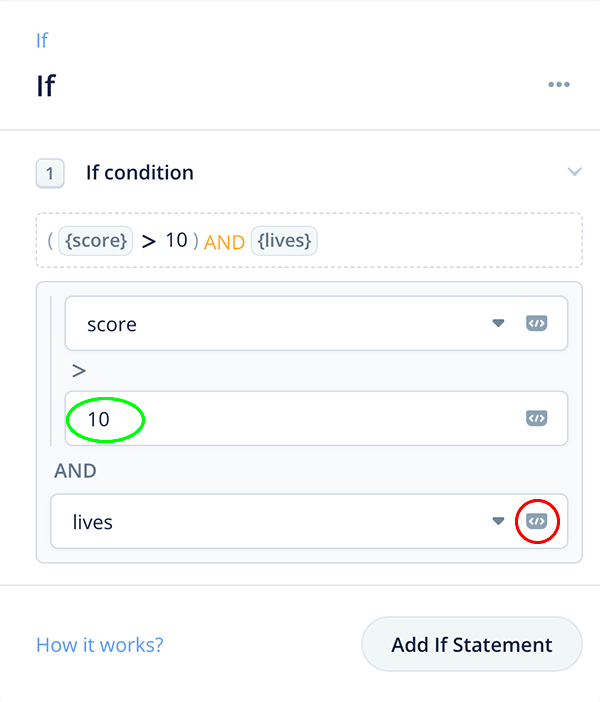
For this tutorial, the value entered is “10.” Continue noticing how the formula, and particularly the parentheses, are shaping up in the Expression bar.
Click on the operator icon for the second condition. This is the little </> symbol.
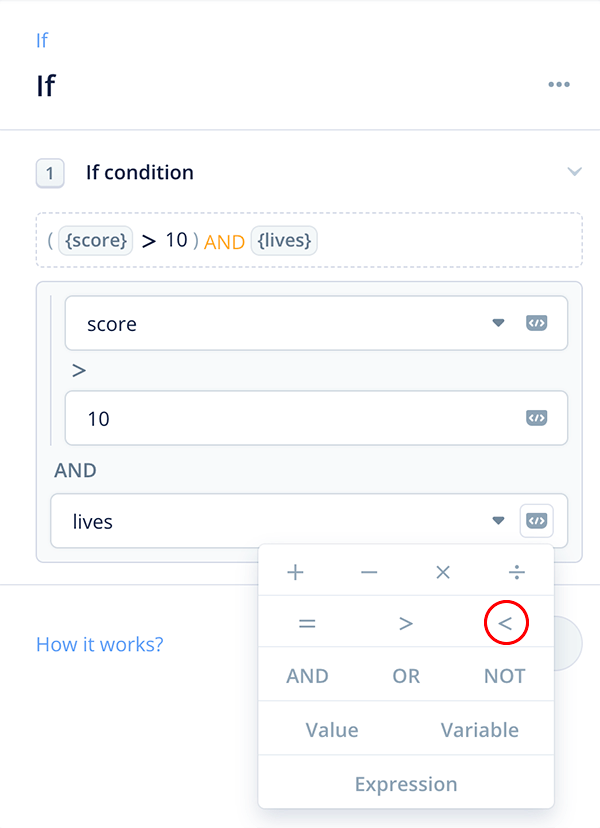
Select your comparison operator for your second condition. In this tutorial we are selecting the “<” symbol.
Notice how the “<” has been added to the screen for the second condition. Next, in the “value” field, enter a numerical value. Again, note that this can also be another variable.
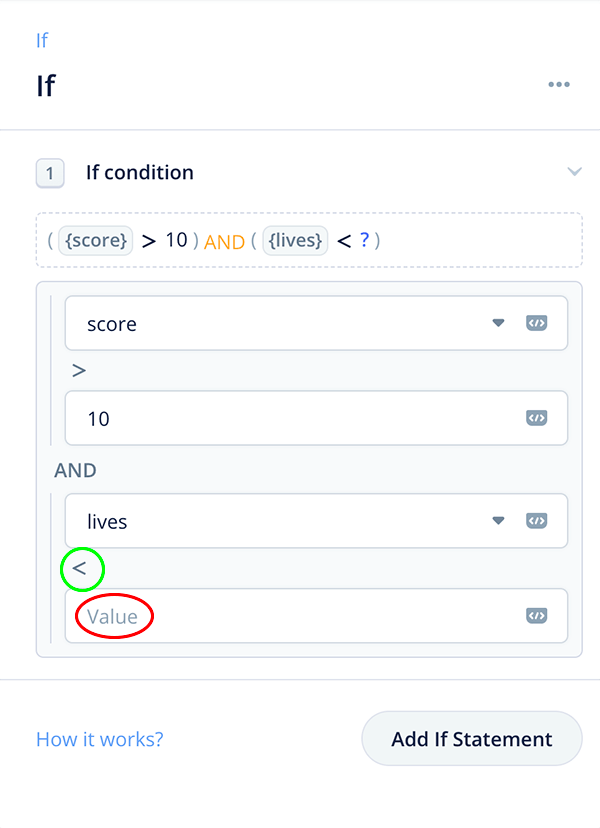
For this tutorial, the value entered is “3.”
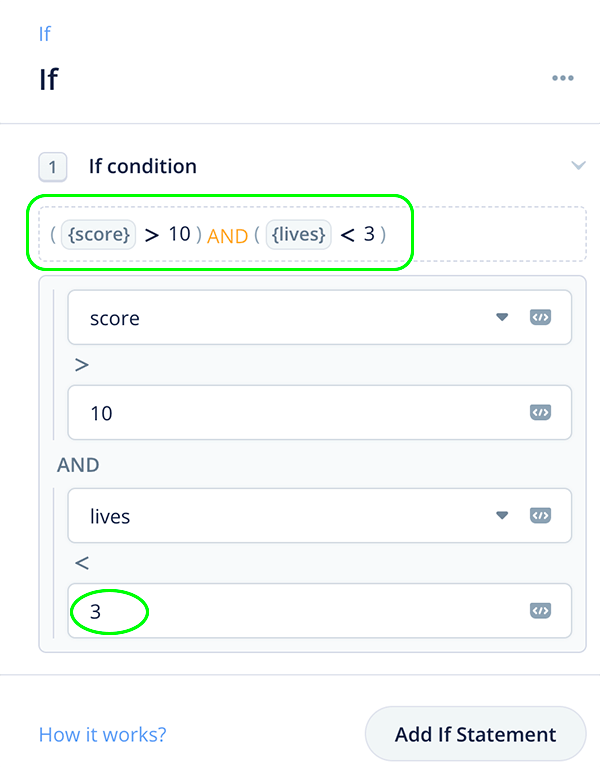
Notice how the formula, and particularly the parentheses, are all in the right places in the Expression bar. It matches our desired outcome:
Desired Outcome: (score > 10) AND (lives < 3)Congratulations, the configuration is complete!
Conclusion
Once you’ve configured a couple of these, it becomes pretty easy. Again, when configuring compound statements in a Voiceflow IF block, the secret sauce is:
- First, configure the AND, OR or NOT first.
- Configure the all of the left operands second.
- Configure all of the the comparison operators and right operands third.
Good luck and happy skill-building!
Credits
Original Photo by kaboompics from Pexels (modified with a VoiceFlow screenshot image).